Showing posts with label LAUAN503. Show all posts

Tuesday, 7 January 2020

Character and Narrative: Final Animation

Character and Narrative
Final Animation

  • This week:
    • We finalised the animation, adding the final textures and credits!
  • Final Evaluation of the Animation:
    • What Went Well:
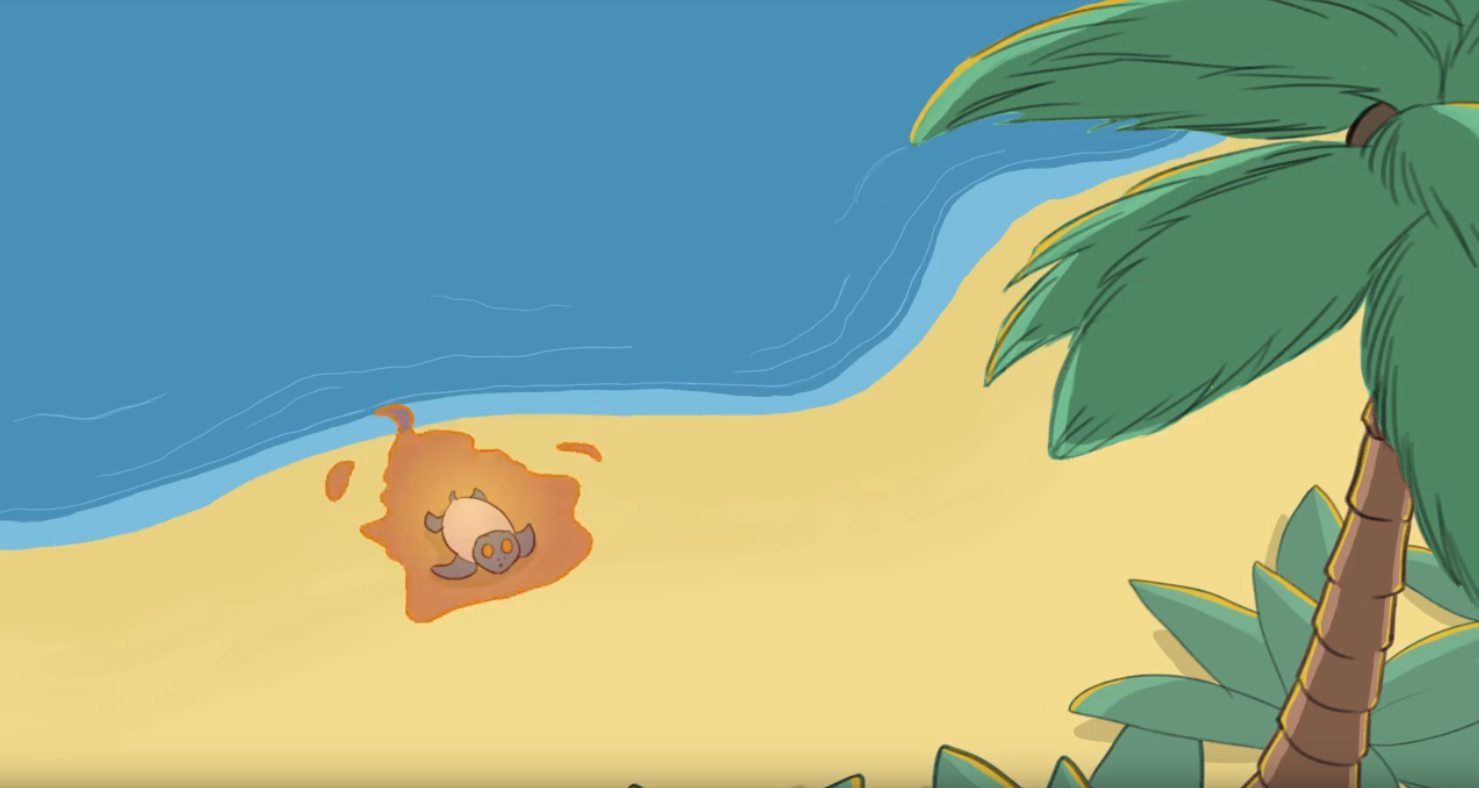
      • The backgrounds and character is relatively consistent, despite the issues with sticking with the style, at first! I think that the team worked well together in sticking with the schedule and all giving input into the final animation.
      • The aesthetic and style of the overall animation reflects what we wanted to go for with it, that being aimed at children ages 7-12 years and the art style reflects this. Another addition of the style was to make it look almost like a storybook, with the sketchy line-work and bright, painted backgrounds.
    • What Could Be Improved:
      • There is a few inconsistencies with the smoothness of the animation and quality, which could've been improved by having more work on inbetweening the initial inbetweens. I think that the inbetweening and animation roles could have been divided and shared better to overcome this issue.
      • There are some inconsistencies with designs, also, which can be improved with further practise in adapting to others' styles and practising drawing the character more, with the model sheet.
    • Next project:
      • I would like to focus on my 2D Animation work, keyframing and inbetweening and also provide more concept work!
Here is a link to the final animation on Google Drive:
https://drive.google.com/open?id=1eMCXj7q4PPerzWzsR8VC3ZErgZLvqXjD

Sunday, 5 January 2020

Character and Narrative: Camera Edits

Character and Narrative
Camera Edits

  • This week:
    • I edited the camera movement of the final edit of Coconut Conundrum!
  • What Went Well:
    • After Afnan had finished the soundtrack edit, I offered to do the camera work using a software I hadn't tried as much before, called Sony Vegas Pro. I had used Premiere previously, however I wanted to also try using this software also, to try learn more ways of editing and expand my knowledge of a wider range of software. I found Adobe Premiere a lot easier to edit in, so this was a challenge, however I was able to create smooth camera-work, with easing.
  • What Could Be Improved:
    • One thing I struggled with was trying to make the camera movement almost feel invisible. Sometimes the movement was a little too harsh, so I had to keep adjusting it.
    • Another thing I would keep in mind for next time, is that despite we drew and rendered the animation in a 2560x1440 ratio so that the quality wouldn't be reduced as much when editing and rendering to a 1920x1080 aspect ratio, the quality could still be better.
    • When I work on the next project, I'll keep this in mind and understand better ways of keeping compression low.
  • This week:
    • I will be finalising the art-book and preparing for submission!
    • The camera-edited version will be passed onto Mark and Afnan, who will be finalising the end credits and adding textures.
Here is the camera-edit version:


Character and Narrative: Study Task 5

Character and Narrative
Study Task 5 - Evaluation

  • Now that the final animation is almost complete, I was able to produce a final evaluation of the entire module. I found this both difficult and easy to produce, as I knew where my strengths were and I fully understood areas of improvement from this module. Something I struggle with is deciding what I would like to focus on for the next modules, in the animation work-flow. I am still not completely sure whether to focus on pre-production work, or to improve my 2D animation skills, or even focus on background art. This is something I need to decide and explore in the next module.
  • Here is the final evaluation:


Sunday, 29 December 2019

Character and Narrative: Study Task 4

Character and Narrative
Study Task 4 - The Art Of Coconut Conundrum!

  • For this task:
    • I researched a series of Art Books in order to understand the layout and style in-which other studios approach showing the process of their work. I looked at 'The Art of Steven Universe' and 'The Legend of Korra - Book 3: Change, The Art of the Animated Series,' for my research.
      • One of the first things I noted from both books, was the use of sketches and fully rendered ideas on the same page, illustrating the thought process of creating the worlds and characters. 'The Legend of Korra' artbook included a lot of storyboard ideas and had individual pages for characters and backgrounds.
      • As a group, in creating the art-book, we set out a structure which follows the pre-production, production and post-production phases.
The Legend of Korra Art-Book Sample:


Steven Universe Art-Book Sample:

  • Unfortunately, we had only one character, so a lot of the development work was just creating concepts and expressions for them. We also only had one location, so the environment concepts focused on beaches and tropical landscapes. This is something which can be improved upon in the future, exploring more ideas for character designs and being more creative with environment concepts.
Here is the art-book:


Monday, 16 December 2019

Character and Narrative: Study Task 3 - Article 2

Character and Narrative
Study Task 3 - Article 2

  • For the second article, I decided to explore 2D Concept Art and briefly cross compare using predominantly 2D concept art, as a comparison to using 3D tools and 3D Concept Art. The research I conducted helped develop the reasoning behind creating loose and brief sketches and concepts, in comparison to using 3D tools to create more advanced and developed concepts for ideas. I decided to explore this, as part of my contribution to the groups' project was a lot of concepts at the beginning.
Figure 1


When producing concept art in a 2D medium, a concept artist can produce a variety of quick and simple ideas, on paper. It additionally allows for the exploration of style and the way in which a character or environment is created can be adapted at this stage to fit the narrative and the visual direction of the director. This is something my group had initially explored, at the beginning of Studio Brief One, when creating a character. Concept designer, Urschel, J (2017), who had previously worked for Ubisoft and LucasArts, states that concept art is the, “artistic impression” of a brief, “in order to provide a visual guide for production artists. One limitation to using just primarily 2D for concept work, is that complex forms and structures may not be able to be visualised as quickly, as what using a 3D software would allow. Concept artist, Feghali, W. (no date) states that, “3D renders provide a fantastic plate to paint on, reference model figures that you can design on top of, automatic perfect perspective for scenes, and tons more.”  The 3D tools can help provide perspective and is being used more predominantly by professional concept artists, to quickly visualise more complicated ideas or to have a rough guideline for creating environments. In order to create concepts for 2D mediums, the use of 3D tools can help with perspective and simplify complex structures for animation and should be used in future projects and studies to help refine current skills. Arguably, 2D Concept Art works to help establish initial ideas, which don't need to be fully rendered and additionally provides a medium which allows for faster idea generation and an artistic response to a brief, as evident in Figure 1, which is a series of background concepts, which can then be adapted into 3D work. The 2D medium allows for quick renders, to establish a colour palette and mood for an animation.


Urschel, J. “What is Concept Art?” The Ultimate Concept Art Career Guide. Ed. 3Dtotal Publishing. United Kingdom: 3Dtotal Publishing, 2017, pp 10-15, Print.


Saturday, 14 December 2019

Character and Narrative: Shadows and Colouring

Character and Narrative
Shadows and Colouring

  • This Week:
    • In order to try speed up the colouring process, I went into all coloured files and made sure that the colouring was neat and that the file contained shadows, which was some feedback from the weekly.
  • What Went Well:
    • I managed to add shadows and finalise the colouring, such as in Scenes 2, 3 and 6, which was what I needed to colour. I additionally finalised the inbetweens for scene 6, to speed up the process, which Mark was originally needing to do.
  • What Could Be Improved:
    • I think that I should have taken more initiative and was a little harsher when it came to giving deadlines to people and then distributing the workload of things that hadn't been yet completed. I have learnt this for future projects, however and will try to be more assertive with deadlines.
    • During the weekly, we are told to adjust some timing and framing on Scene 5, which I went and adjusted, as the background wasn't properly in place and the timing needed changing.
  • Next Week:
    • The editing process will begin!
    • I will be making an improved soundtrack, further concept work for the art-book and finalising any scenes that may need redoing or adjusting.
Scene 6 - First Half - Colouring, Shading and Coloured VFX based upon Rachel's flickering gradient idea for the fire in the second half


Scene 5 with shadows and timing/background adjustments, based on Weekly Feedback


Scene 2, Shot 3, an example of added shadows this week

Sunday, 8 December 2019

Character and Narrative: Study Task 3 - Article 1

Character and Narrative
Study Task 3 - Article 1

  • For the first article I decided to research storytelling/narrative and the use of aesthetic and visuals. I started by looking at how the 2D animated aesthetic affects the narrative and found a lot of research into the Synchronic Narrative. A lot of what I looked at was more theory based than analytical, which provides an in-depth exploration of narrative theories and they could be applied to future animation projects and to the current main studio brief.
 Figure 1

Figure 2

Due to the 2D medium chosen for our response to the main brief in this module, the aesthetic and style decided for the medium must reflect the narrative and appeal to the audience. Herhuth, E. (2017) references chief creative officer at Pixar and Walt Disney Animation Studios, John Lasseter, stating that, “Lasseter’s emphasis on believability over realism echoes the “illusion of life” approach articulated by Disney animators Ollie Johnston and Frank Thomas,” meaning that the visuals of the characters and their movements are believable and captivating, that audiences are able to forget that the world and narrative is fictional. This can be done through synchronic narrative, which is a theory developed by Levi-Strauss, C. (1955), which is demonstrating all narrative contexts at one time. Collington, M. (2016) states that, “Animation studios often use [...] synchronic methods for devising a range of alternatives for a single image to best represent [...] an overall sequence, scene or even a narrative stage.” It represents the narrative or series of events which can be established in a single image. An example of this would be in Figures 1 and 2, as the aesthetic and elements of the scene is conveying narrative in a single screenshot from the short animation. The best storytelling and aesthetic can encapsulate narrative and appeal to audiences at the same time, which can be done in the 2D medium. 

Sources:


Herhuth, E. (2017) Pixar and the Aesthetic Imagination: Animation, Storytelling, and Digital Culture. Oakland, California: University of California Press.

Collington, M. (2016) Animation in Context. London, United Kingdom: Bloomsbury Publishing.

Lévi-Strauss, C. (1955) ‘The Structural Study of Myth’, The Journal of American Folklore, 68 (270), pp. 428-444.

Saturday, 7 December 2019

Character and Narrative: Colour and Improvements

Character and Narrative
Colour and Improvements

  • This week:
    • I continued work on colouring the final scenes and updated the Scene List to keep up to date with the workflow.
  • What went well:
    • I was able to work on the colouring very quickly and can continue to do this into next week, once Mark has completed his inbetweens.
  • What could be improved:
    • Rachel pointed out that some of my colouring wasn't consistent and sometimes, there were white gaps where the colour meets the lines, so I fixed this, by going back over those frames and using just the brush tool to fill in any gaps and make the colouring neater and more consistent. I will remember to do this also, when I colour further scenes.
    • In addition to this, we decided as a group to add shadows during the colouring process, under Teddy and the coconut, so they feel more incorporated into the background.
  • Next week:
    • Ill be adding shadows during the colouring process and making sure that the colouring is neater, so that there are no gaps with the line work. I will be doing this once Mark has finished his inbetweening.
Initial Colours:

Improved Colours, with Backgrounds and Shadows:


Saturday, 30 November 2019

Character and Narrative: Keyframes and Colour

Character and Narrative
Keyframes and Colour

  • This Week:
    • I finalised the scenes I needed to keyframe and also spoke to Rachel about getting all of the other keyframes done. I also began the colouring process this week!
  • What Went Well:
    • I managed to get my keyframes completed and throughout the process I continued to improve on my consistency with the frames. I was also able to time the coconut fall well, despite not being sure how it would crack and split when it fell. Using the "bouncing ball" references and timing, I was able to create the impact.
  • What Could Be Better:
    • We ran into a problem, which was that the TVPaint at University was not the professional version and therefore, we couldn't utilise the Inlay Texture effect in TVPaint. This was going to be used to add a texture to Teddy's shell. 
    • We will continue to try and find a way around this, however we may have to just stick with the paper texture in After Effects, as we may be short of time.
    • I noticed the last shot, that Teddy's cheek spots disappear, so I need to add those in to post into the drive.
  • Next Week:
    • Mark will be working on the final betweens, whilst we colour each scene! We can then get onto exporting the files in the last week.


Saturday, 23 November 2019

Character and Narrative: Study Task 2 - Improvements

Character and Narrative
Study Task 2 Improvements

  • In order to improve my work done for Study Task 2, which was the lip-sync animation in After Effects, I decided to spend more work animating a character in TVPaint and then added the lip-sync in After-Effects, if the frames/sounds repeated.
  • I used the same Dope Sheet, however, changed the appearance of the mouth shapes, with some of the frames are 1.5 and 2.5 etc. as in-betweens of the mouth shapes.
    • In addition to this, I changed the characters' design slightly, with the red eye and metal enhancement around the eye, just as a small homage to the source of the sound clip, from  Stanley Kubrick's 2001: A Space Odyssey (1968). 
  • One improvement I could make, would be to temove the additional head bounce when he says "anything," as it's a little bit too expressive for the voice speaking. I found it difficult to add expression to a very flat voice, so the first part of the lipsync works well, but I would remove the head bounce next time.
Here is the first lipsync


Here is the improved one:


Thursday, 21 November 2019

Character and Narrative: More Keyframes and Animated VFX

Character and Narrative
More Keyframes and Animated VFX

  • This week: 
    • I worked on trying to get the keyframes done for more scenes, so that Afnan can continue inbetweening them. I also did come test drawings in my sketchbook, for one of the scenes I was going to key-frame next.
  • What went well: 
    • I found that I was getting better at keeping consistent with the style for Teddy and the smoothness of the linework. When working on Scene 6.5, I had a look at Elemental Magic, Volume II: The Technique of Special Effects Animation by Joseph Gilland, to understand how fire can be animated with 2D techniques. I also looked at a series of references, such as the scene in The Lion King, where the final battle takes place and the land is in flames. I also looked at YouTube tutorials on animating explosions and bursts of fire. These all helped me to try to understand 2D VFX.


  • What could be better: 
    • I need to improve on my timing a little bit, especially with just teaching myself the VFX side of animation. Some parts could have been a bit slower, to allow the viewer to exaggerate the effects more.
  • Next week: 
    • I will be continuing finishing key-framing my final scene, then start the colouring process.


Thursday, 14 November 2019

Character and Narrative: Keyframing and Mock Cover

Character and Narrative
Key-framing Scene 3 and Mock Cover

  • What I did: 
    • This week I also began key-framing scene three of the group animation. 
  • What went well: 
    • Learning from my mistakes from the first scene framing, I was more consistent in shape and in the line-work, by taking time to look back at the turnaround for reference or redrawing frames if I needed to!
    • I sent the work in progress to the group and they told me to continue with what I was doing, therefore starting work key-framing the next scene.
    • I additionally produced a "mock cover art" for the animation, using one of my background concepts. Overall, the concept worked well and I looked at a variety of cover-art online, for childrens' animated shows, such as Steven Universe and Gravity Falls and they incorporate a lot of the final style into this. 
  • What could be better: 
    • Unfortunately, we had not produced a logo/title card for the animation yet, so Rachel said she'd like to try create one!
  • What I need to do next time: 
    • Produce the key-frames for the next scene I am assigned to!
Scene Three Key-frames:


Mock-Up Cover Art


Wednesday, 13 November 2019

Character and Narrative: Keyframing

Character and Narrative
Production: Key-Frames Week One

  • This week:
    • Rachel created a second spreadsheet on the Gantt Chart document, which is a scene and shot breakdown. We added to it, gradually, when we met together as a group to look over it. It looks at timing and roles for each scene.
    • I started key-framing my first scene, in TV Paint!
  • What went well was:
    • Our teamwork and communication was commented on during my Formative Feedback. Additionally, keeping on top of work, documenting and critically analysing the entire process.
  • Next time:
    • I need to be more consistent in my key-frame process. I am still a bit rusty from not doing it for a while, and I need to be more consistent in the line work so that it's easier for Afnan and Mark to in-between.
    • I need to look at using references of turtles to help with the movements!
  • For the rest of this week I will be working on the second set of key-frames and developing a slideshow for the weekly presentations.
The first scene:


Here is our scene list for organisation:


Thursday, 7 November 2019

Character and Narrative: Background Development

Character and Narrative
Background Development

  • This week, as part of our production work, we decided to fully finalise the backgrounds, before starting any animation work. Based upon the research we had done before on background design, we decided on a final aesthetic, where I would be lining the backgrounds. This would then be passed onto Mark and Rachel, who would be colouring the backgrounds, to make the process quicker and easier, dividing the work between us.
  • I think that I was able to use Afnans' 3D renders of the backgrounds effectively, whilst adding additional detail to the line work. I think that I could improve my lining process by practising better technique, using my whole arm instead of my wrist. This would allow for smoother and more confident lines.
  • Here are two examples and a link to the folder with my lined backgrounds in:


Here is the link to the folder: https://drive.google.com/open?id=1mQ8vjN5IzQ8Rx8V9qynDFB_1uSQU3Sod


Saturday, 2 November 2019

Character and Narrative: Study Task 2 - Lip Sync Test

Character and Narrative
Study Task 2 - Animated Lip Sync

  • This week we were task to produce a simple lip sync animation using Adobe After Effects to a chosen one of the provided clips. In class, I produced the lip-sync with the provided Phoneme mouth, as a test and then once I had gotten the hang of the idea, I produced my own mouth and character for the audio. I decided to try and use as minimum as possible frames and mouth shapes, reusing some shapes for L sounds, for also N sounds. This made it easier to edit to understand how the software worked. 
  • It additionally tested my timing, as I don't usually produce animation with limited frames.
  • Here are my notes and the Dope sheet I filled;


Dope Sheet

  • I decided to use the time remapping feature I had learnt to try and add some movement to the character, again, with limited frames. I tried to make the emotions match the audio clip, however it was difficult to tell exactly what was implied and I left this to interpretation.
  • Overall, the lip sync could be a lot smoother and I think that some of the frames I used for the mouth doesn't work for every sound. I will make note of this in the future when I do lip syncs.

Here is the final clip:


Character and Narrative: Storytelling through Sound

Character and Narrative
Storytelling through Sound

  • After completing the animatic, the seminar on storytelling through sound was particularly helpful in helping me improve the non-diegetic track which is playing over our animation. Despite this, I thought that I'd done well with creating more of an ambient track, which doesn't drown out the sound effects applied on top. I used the Ukulele, bongos, marimba and further percussion as part of the track to reflect the tropical landscape which Teddy lives.
  • The soundtrack could be greatly improved and when I showed this to the group they suggested removing some of the percussion and adding more unnatural audio to the sound effects, which Afnan will be editing.

The soundtrack work in progress can be heard here: 


Wednesday, 30 October 2019

Character and Narrative: Title Sequence and Backgrounds

Character and Narrative
Title Sequence and Backgrounds

  • This week we had a lecture on Title Sequence design, which looked at a variety of title sequences and how we could incorporate them as part of the narrative itself. Here are my notes on title sequence design, which can be implemented into our work:

  • As part of work on the background, we wanted to explore some colour schemes in our group, and also decide how we could use one image for panning, such as in the introduction. I used the book 'The Color of Pixar' again, for inspiration on this. Which can be found through a flip-through video here:


  • From looking at the way Pixar had done this technique, we thought that using orange, warm tones for the background would help with mood. In addition to this, using cooler tones for the shadows and sky. This would be a part of the title sequence.


Sunday, 27 October 2019

Character and Narrative: Animatic

Character and Narrative
Animatic

  • After Rachel produced the initial draft of the storyboard and worked on the refined storyboard, I then produced an animatic from this. Instead of using images from the storyboard, I redrew each shot, to then time key poses correctly. I had a bit of trouble with this, as Photoshop was having rendering issues and so I have to re-export the animatic several times, to get the timing right.
This is the drafted storyboard:


  • This initial export was this:


Then, because the timing was too fast, I went back over the file and adjusted the timings of some shots in the middle and this was the version, without sound. Then, I sent this file to Afnan, who would be editing the sound for the animatic and the final animation.


Friday, 25 October 2019

Character and Narrative: Researching Aesthetic

Character and Narrative
Researching Aesthetic and Style


  • Alongside some of the concept work I had been producing, I needed to research aesthetic and visuals for childrens' animation, such as how the animated style used in the 1930s was developed and influenced.
  • I made notes on my research and findings here:
    • Using Animation: The Global History, by Maureen Furniss, I was able to make detailed notes to help with my concept work.

    • The research helped to not only develop the initial narrative ideas to be then made into a storyboard, but it also helped for further research into the visual styles used in Disney, Fleischer Studios, Warner Bros. and the influences of physical and verbal comedy into animated shows.
Furniss, M. (2016). Animation: A Global History. New York: Thames and Hudson.

Monday, 21 October 2019

Character and Narrative: Making Improvements

Character and Narrative
Making Improvements

  • At the start of this week, I decided to try and develop more concepts for Teddy the Turtle, to try and loosen his design, to make the posing easier and easier to animate.
  • I did this by looking at the concepts I had already created for the character and trying to apply a line of action to create more dynamic poses. I found that when I applied Teddy to a background, which is from the storyboard, I was able to pose him better and more fluidly than I had before. I thought of him more in shapes, rather than anatomically, which helped a lot.
  • I think this would greatly help with my character drawing and I will try to adapt this more in the future.