Sunday 28 March 2021

Professional Practise 3: Researching Studios

 Professional Practise 3
Researching Danish Studios

  • As part of Professional Practise 3, I needed to create a plan for post-graduation. One of these routes consisted of exploring possibilities for working in Animation Studios in Denmark, or considering doing freelance work in Denmark, so that I could move and live with my long-term partner. In order to understand the opportunities better, I decided to research studios and positions based in Denmark.
  • I, first, tried exploring the Animation Jobs spreadsheet, accessible here: https://docs.google.com/spreadsheets/u/1/d/1eR2oAXOuflr8CZeGoz3JTrsgNj3KuefbdXJOmNtjEVM/htmlview. Job listings are organised based upon the country of origin, so I specified positions only based in Denmark. 
    • All of the roles at the moment seem to be based in Copenhagen and are only for 3D Artist jobs. 
  • I, then, came across this website, https://onelightvfx.com/, which lists as many studios based in different countries. I could here locate Danish Animation Studios with much better ease and try to find some which could have potential positions.
    • https://onelightvfx.com/studio-list/complete-list-of-2d-3d-animation-post-production-and-vfx-studios-in-denmark/

  • Danish Animation Studios
    • Kiloo
      • https://www.kiloo.com/
      • Online Games studio, with studios in the UK and in Aarhus, Mainland Denmark   
    • Lani Pixels
      • https://www.lanipixels.com/
      • 3D Animation Studio
    • SYBO Games
      • Mobile games, based in Copenhagen.
      • Have internships available, such as Concept Art intern.
    • Illusion Media
      • 3D VFX and 2D Graphic infomercials, based in Aarhus, Mainland Denmark
    • EyeCandyFilm
      • Animation, Live-Action and Mixed Media film for TV, feature films, shorts, teaching and computer games.
    • Sun Creature Studio
      • 2D Animation studio, based in Copenhagen. They additionally have a studio in France. Clients consist of Cartoon Network, Netflix and Riot Games. 
      • Can apply any time to work, as they are consistently reviewing applications:
        • https://suncreature.com/jobs/
    • Wilfilm
      • 3D Animation Studio, https://www.wilfilm.dk/

  • Applying to work in Denmark
    • The Danish immigration service website offers help on seeking employment and how to obtain a visa to work or study in Denmark. For a long time I was considering studying for a Masters in Denmark, whilst we were in the EU, however this is no long doable, as Denmark only offers free tuition to citizens of the EU. 
    • Work Visa:
      • https://www.nyidanmark.dk/en-GB/You-want-to-apply
      • To apply for a Visa, you need to be offered salaried employment in Denmark
    • Start-Up Denmark:
      • https://www.nyidanmark.dk/en-GB/You-want-to-apply/Work/Start-up-Denmark
      • Could be doable for self-employment, however it states that the schemes are for larger businesses, which would not apply to me.
    • Overall, it feels incredibly difficult to apply for work in Denmark at the moment, with the current state of the pandemic and my current skills. It has been something which has worried me a lot, however putting in the time for this initial research has given me more insight on what I could do going forwards.

  • Working in Denmark
    • Once I am able to secure work in Denmark, I will need to apply for a Work Visa and apply for a banking account within 6 Months. In terms of driving in Denmark, I can exchange my UK License for a Danish one later, however I can apply for an EU License, once I have moved there.
    • Work Visas usually last the duration of time you are contracted for work for, however usually end at 3 years. You must re-apply for a new visa, if you are still working within the country. 

Friday 26 March 2021

Extended Practise: Live Brief - 11 Second Club March

 Extended Practise
Live Brief - 11 Second Club March


  • This week:
    • I worked alongside Caitlin and Rachel to produce a quick animation for this month's 11 Second Club.
  • What went well:
    • As Rachel had already started an animatic with her characters, I took the roughed animatic and re-drew it in Toon Boom Storyboard Pro. As the version sent to me was also incomplete, I needed to add an additional shot at the end to make up for the last few seconds.
    • I additionally followed Rachel's character sheets when cleaning up the animatic.
    • Here is Rachel's animatic, followed by my cleaned up version:


    • As we only had just over a week left before the deadline, we had to put together a quick Gantt sheet for the production. We didn't have any pre-production work, as the characters had already been designed by Rachel. This gave us a little bit more time to work on each shot.
    • Here is the Gantt Sheet:


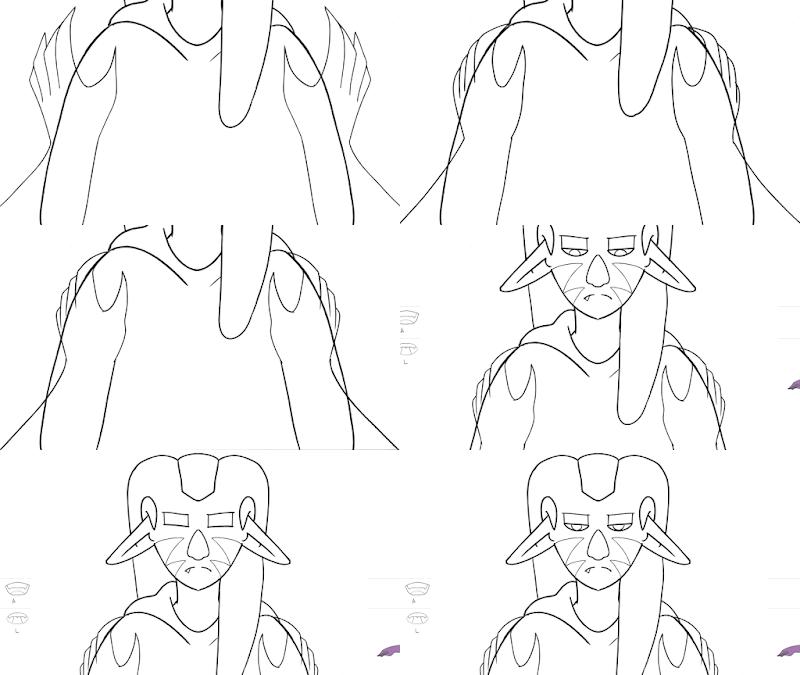
    • I, then, started on the animation. We discussed that we were going to try keeping the movements simple, in order to get the animation done for the deadline. Therefore, I mainly followed the animatic for the keyframes. 
    • I think that I have gotten much better at keeping on model with characters, as I was able to follow Rachel's reference sheets quite accurately. 
    • Here are the keys:
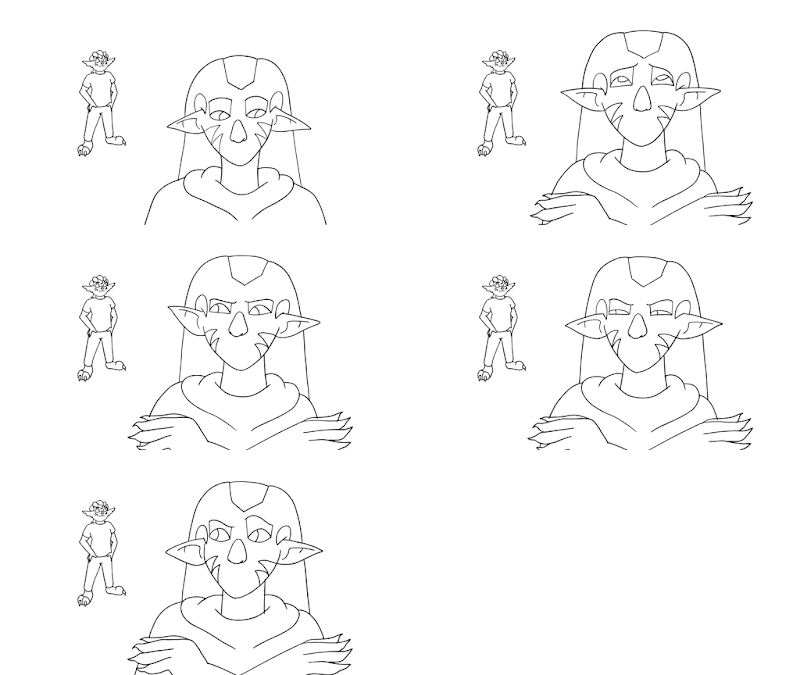
Shot 1 Keys

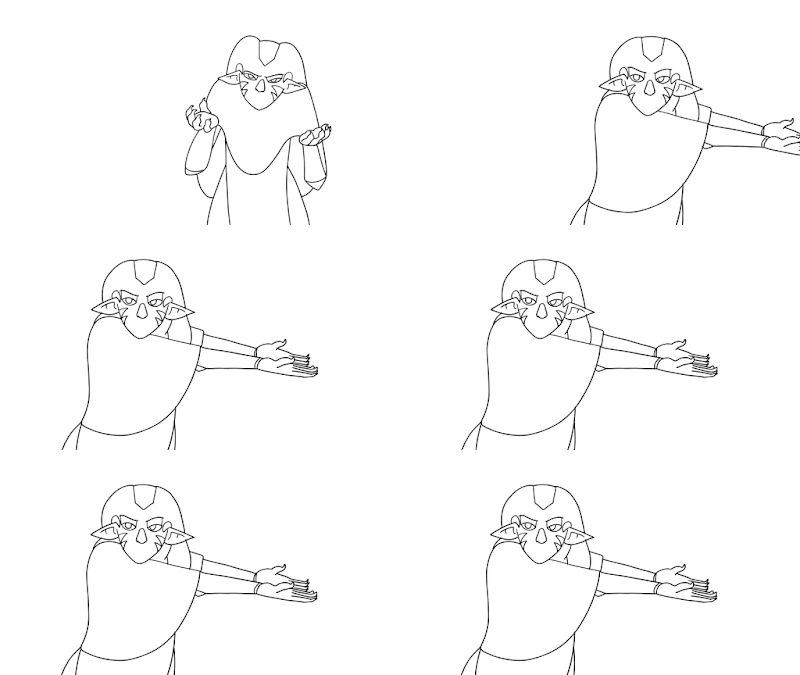
Shot 3 Keys

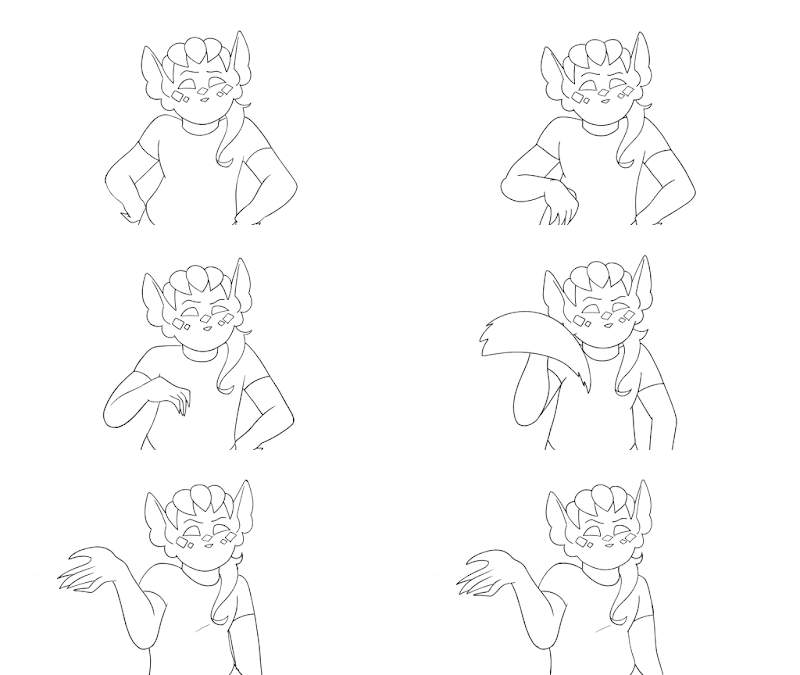
Shot 5 Keys
    • I wanted to put more movement and expression into the keys, however we had such a tight deadline to follow, so I kept the movement simple.
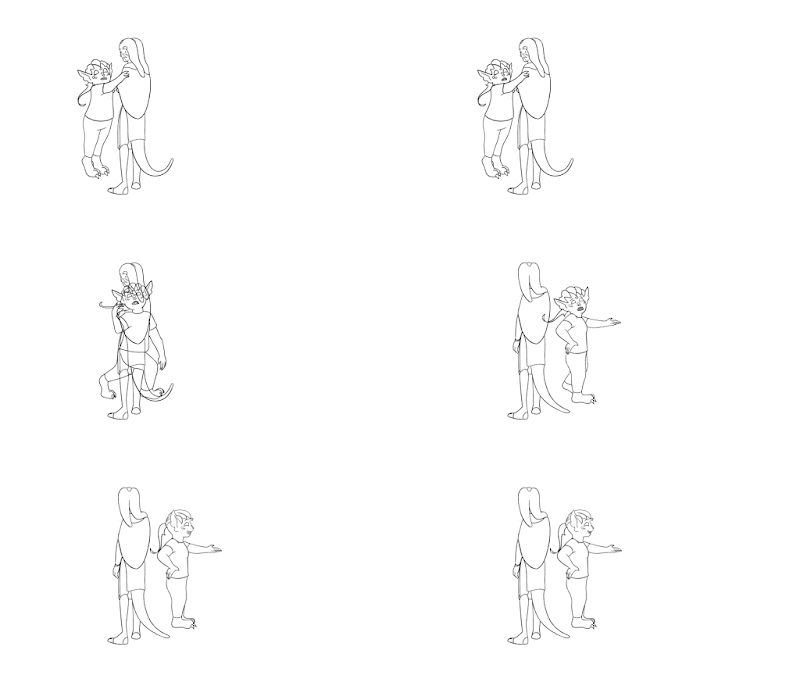
    • Once Rachel had keyed their shots, I moved onto inbetweening those. For the inbetweening process, I made sure to only expose frames on 2s and 3s, rather than making them completely smooth. This meant that I needed to think about the timing of the poses more than the fluidity.
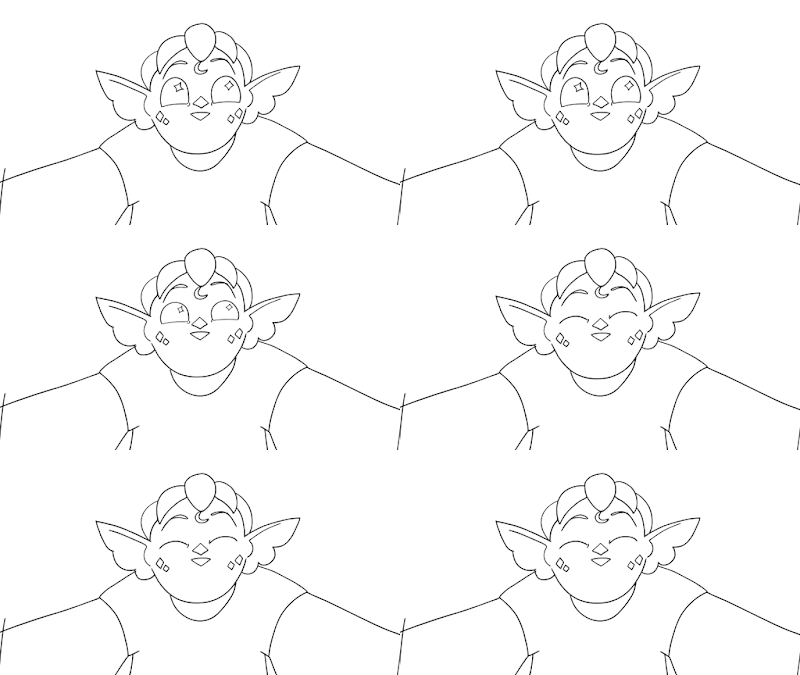
Shot 2 Inbetweens


Shot 4 Inbetweens


    • For Shot 6, however, I needed to adjust some of the keyframes, as the leg movements at the beginning of the shot seemed slightly wrong and would make the character jump slightly.
    • Once I had inbetweened everything, I went back in to do the lipsync, as this made the process much quicker. 
    • For Shot 2, the lipsync seemed slightly too fast, at first, so I had to go in to make adjustments to that, exposing the frames on 2s rather than 1s.

Shot 6 Inbetweens


  • What could be improved:
    • With the time restraints, we had to make the character movements much simpler and settle with frames that didn't seem too perfect, instead of going back in and making large improvements. This is something I would consider in future projects to shorter deadlines, by planning much more effectively or assuring that we have an appropriate amount of time for production.
    • I think that some of the lines vary a little bit in size and weight, when I was inbetweening. I will need to pay more attention to this in the future, by making sure my pen pressure sensitivity isn't too high or that the brush size is accurate with the keys.
    • The framing and camera position for Shot 6 doesn't seem to work very well, as it has the character moving behind the other. I think it would've worked better with the camera facing them from the front and Kaxer would then move forward, towards the camera.
  • Next time:
    • Rachel will be colouring the animation and putting it together ready to submit!


Thursday 25 March 2021

Professional Practise 3: Collective vs. Studio

 Professional Practise 3
Setting up a Collective vs. Studio


  • As part of our 602 Module, Joseph and I have decided to research and develop a potential freelance studio, which we could start once we have graduated. We had a 1-2-1 session with Michaela to discuss this idea and she suggested the possibility to create a collective, rather than a studio, as this aligned more with our interests. In addition to this, Joseph had contacted the animators working on Schwa Animation and we found that they are currently under a Collective name, as they aren't officially a studio yet. This is something we have decided to consider going forwards. 
    • In learning this, we decided to conduct some initial research into Collectives vs Studios.

  • What is a Collective?
    • A group of freelance artists working together. Usually are self-employed freelancers, but don't always need to be.
    • Project work is usually all on the same level. There wouldn't be the same hierarchy of roles which are seen in a studio.
    • Taxes are paid individually, through freelance work.
  • What is a Studio?
    • People are employed on specific roles within the Studio.
    • Taxes are usually paid through the studio, rather than individually in a Collective.
    • A Studio is technically it's own business and would need to be set up according to Government laws.

  • What is best for us?
    • Joseph and I believe that the Collective will be the best starting point when everyone graduates, as this will allow people to continue to develop their portfolios and would lift any pressure on us to try starting a studio straight away, without any funding or project ideas.
    • With starting as a Collective, it would also give us all a feel for the work and how we can work together going forward.
  • I made some initial notes on funding and research, which would be used going forward, as a Collective. Here are the notes:

Sunday 21 March 2021

Extended Practise: Final Film Inbetweens

 Extended Practise
Final Film Inbetweens Progress


  • This week:
    • I worked on the inbetweens for Shot 22 and 23.
  • What went well:
    • I finished both of the in-betweening for Shot 22 and 23. Last week I had mentioned I wanted to make some improvements on the anticipation before Geoffrey shakes out his feathers. In addition to this, my group and in the weeklies, I was advised to try and make Geoffrey's feathers stick out as he shakes. I needed to redraw some frames in order to achieve this.
    • Here is the final inbetweens for Shot 22:
Shot 22 Inbetweens Progress


Shot 22 Inbetweens Final


    • For Shot 23, I still needed to clean-up the roughed key-frames. I started by doing this before I inbetweened. In previous weeklies, Mike had mentioned making sure to keep the line thickness consistent depending on the distance the character is from the camera, therefore I made sure to use a smaller brush size when keying this shot.
    • I found the inbetweening incredibly difficult for this shot, because I needed to understand the timing and spacing for the Geoffrey's flying. I had to make several adjustments to this, so it would flow better.
    • Here are the final inbetweens:

  • What could be improved:
    • I still think the timing of Shot 23 needs to be adjusted of him flying away. I think it's the way it slows down as he turns, so this is something I may need to adjust if there is additional time.
    • For Shot 22, when he finishes shaking his body and lifts his head, I think it could use an anticipation where he crouches down slightly. This is something I'd consider for future animations.
  • Next time:
    • I will be working on colouring Shot 19.

Friday 19 March 2021

Extended Practise: Final Film Inbetweens Progress

 Extended Practise
Final Film Inbetweens Progress


  • This week:
    • I made improvements to Shot 18 and started keying Shots 22 and 23.
  • What went well:
    • During the weekly, I showed the group the inbetweens I had done for Shot 18 and asked if anyone had an idea was to what needed to be done for the jump back. Ben suggested slowing down the timing and slowing the camera. I also re-drew some frames so that this would work properly. After doing so, I believe this works a lot better now.
    • Here is the updated shot:


    • I additionally worked on Shot 22 and 23 this week, starting with the keyframes. Initially, Geoffrey just walked on screen and stared at the camera, according to my animatic, however I wanted to add a bit more character and movement in this shot. I keyed him coming into shot, taking a large inhale, before shaking out his feathers, then looking at the camera. I thought this worked well, as I intended him to seem like he was shaking off the experience. 
    • Here are the key-frames for Shot 22:


    • When I came to Shot 23, I found that I hadn’t animated a bird flying before, so I used reference footage of two swans taking flight, so I could understand the positioning of the wings. Here is the reference footage:

    • As I just roughed out this shot, I think this works well, as it allowed me to make adjustments if I needed to, without fully committing to a movement/drawing. I will take this idea forward for future projects, if I am unsure about the acting or movement of a character. 
    • Here are the rough keys for Shot 23:

  • What could be improved:
    • I showed my group the keys I had done for Shot 22 and they thought I could try adding an overlap and follow-through motion of his “puffed out” feathers, which is something I will look at when I come to between this shot.
    • I think that the anticipation, when he inhales and his body rises up, could be exaggerated further, so I will push this slightly when I come to between it.
  • Next time:
    • I will be working on the inbetweens for Shot 22 and 23.

Monday 15 March 2021

Extended Practise: Final Film Inbetweens Progress 4

Extended Practise
Final Film Inbetweening Progress 4


  • This week:
    • I worked on the inbetweens for Shot 16 and the keyframes, inbetweens and colour for Shot 18.
  • What went well:
    • Initially Shot 16 was intending to be a still frame of the hedgehog character sleeping peacefully beside his mother, however I decided to give this a little bit more life by adding a breathing animation. This would then make the scene feel less static in comparison to the other shots and add more life.
    • Here is Shot 16, with the inbetweens:
Shot 16 Inbetweens


Shot 16 with background
    • I additionally worked on the entirety of Shot 18. I started by keyframing the Air Hostess for this shot and animating the rain on the window straight ahead. I used reference footage found on YouTube of rain on glass to help with this.
    • Here are the initial keyframes:


    • After getting some feedback, my group told me the rain-drop effects work really well, but the keys of the Air Hostess feel boring and flat. I also realised she moves back into the aisle, so I needed to animate her jumping back. 
    • Rachel also mentioned that the Air Hostess should come in further to the camera, making the viewer (from the point of view of Mr. Goose) feel uncomfortable.
    • To make this movement work I made use of the camera feature in Toon Boom, which I needed to understand more.


    • I also did a quick test for the oxygen masks, using the deformer tool in Toon Boom. I had previously learnt how to use this when I worked on my Documentary last year, so I used it in this shot to make the oxygen mask swing much easier to animate.
    • The first inbetweens, whilst smooth, were a little bit too quick, so I went back in and added some additional frames.
    • I think I did a great job with the drag of her "head poof" when she moves back and, again, making use of smear frames, which stays consistent with the animating style.

Shot 18 first inbetweens


Shot 18 Improved Betweens

    • Once the betweens were improved, I worked on the colour, which was a much easier part of the process. Now that I understand colouring in Toon Boom Harmony, the process didn't take me too long.
    • I still need the final background for this shot, before I can finish colouring the window, however Joseph and I will be discussing whether it needs to be green-screened for Post-Production later next week.

  • What Could be Improved:
    • There seems to be a slight wobble or frame wobble when she jumps back and I think it could be because of the camera movement not being entirely in sync with her movement. I will double check this when I go back to finish the colour and render the video.
    • If I were to redo this shot, I probably make the frames hold a bit longer, as it feels a bit fast. Especially at the end when she's standing in the aisle, I would like to make it last a bit longer, to hold the tension, before the oxygen masks drop.
    • The oxygen mask drop could be improved further by making them drop at different times and maybe bounce off each other. I will be keeping it this way for now, however if there is more time at the end of Production, I will update these.
  • Next week:
    • I will be working on animating a transition between Shot 7 and 8 and starting the keyframes for Shot 22 and 23.


Extended Practise: Making Foley Sounds

 Extended Practise
Making Foley Sounds


  • This week:
    • I worked on the Foley Sound effects for Aviation Aggravation and Kingdom of Masks.
  • What went well:
    • As I had never recorded my own foley sound before, I had a lot that I needed to consider. I own a Blue Yeti Microphone, with multiple Pop-Filters and a foam sponge over, so I found that I could record high-quality sound without needing to rent a microphone. However, I was limited to recording within my room, as the microphone was plugged into my computer. This meant some of Foley had to be recorded and heavily edited on my phone.
    • To start the process, I used the notes I had made from the talk with Mike Wyled, a sound designer and made quick notes on potential things which could be heard in each scene, based upon his talk.
    • Here are the notes:

    • I started recording sounds on my phone, going down the list of Shots. Some interesting sounds I managed to re-create were the squeaks using my shower, Airplane ambience with the loud fans of my computer and shaking a t-shirt over the microphone to make the sound of Geoffrey ruffling out his feathers.
    • Some sounds, however I wasn't able to record, such as the plane ambience, the airport ambience, pigeon coos and other ambient sounds. This is when I made use of the BBC Sounds Library to find more sound effects to add into the track. Once I had a recording of the first foley sounds, I could then layer them in Sony Vegas, to create layered sounds. I followed Mike's advice of editing and manipulating footage within the software to create different effects.
    • I found that the foley sounded better upon recording it straight onto the timeline, with the video as reference. Here is the final foley track for Aviation Aggravation:

    • I followed the same process for Kingdom of Masks, however the sounds I recorded utilised paper to sound like leaves or running. Here is the foley track for this:

    • I think I did a good job of keeping both foley track subtle, as in both animations the music is more dominant in the Soundtrack
  • What could be improved:
    • Unfortunately a lot of the foley I recorded didn't make it into the final tracks, because they didn't fit the animation well. As I was limited with what I could do from home, I think it's better replacing some of the sounds with pre-recorded sounds from the BBC Sounds Library and manipulating some sounds from Freesound.org.
    • I would be willing to try sound designing again in the future, with better equipment or ability to go outside. Due to the pandemic, it was hard being able to go out to record sounds, so I took that into consideration.
  • Next time:
    • I'll be continuing work on the animation.

Friday 12 March 2021

Extended Practise: Kingdom of Masks Scene 21 Improvements

 Extended Practise
Kingdom of Masks Scene 21 Improvements


  • This week:
    • I worked on the improved/redone Scene 21, after the feedback from last weekly session.
  • What went well:
    • We decided to redo Scene 21, as the sword still felt slightly wrong, even after making improvements. Khoa had also mentioned this was supposed to be an impactful scene, so we all agreed to make it better. Khoa sent me the rough, timed keyframes, so my job was to draw the clean lines on a new layer. I didn’t make any initial changes to the timing of the keys, as I assumed he wanted it to be timed that way.
    • Here is the previous Scene 21:


    • And here is the roughed keys Khoa sent to me:


    • I cleaned these keys, paying attention to my line weights and making sure no frames seemed to wobble or any volumes changed size. In addition to this, I asked Khoa if he wanted me to key some VFX in the background. I agreed to fully animate cloud/smoke effects, as the sword is pulled out of the rocks. I started by keying this, after watching some inspiration they had sent. 
    • One specific inspiration they referred to was the He-Man Opening lightning effect, as he pulls out his sword. I did the rest of the animation straight ahead. 


    • To improve these VFX further I used Toon Booms' effects layers, which adds a blur and lightens the closest segment of cloud.

    • After showing these in the weekly, the keys were then re-timed and updated by Khoa. Some feedback consisted of just making the movement faster, repeating some frames to make him struggle to pull the sword and a smear as the sword comes free. These are now ready for Amy to inbetween here:

Keyframes improved by Khoa

  • What Could be Improved:
    • Despite being further improved by Khoa, I think that I could have tried timing it myself as I was keyframing it. I assumed the keys needed to be specifically timed how the roughs were, so I followed them exactly. In the future, I will keep in mind maybe putting forward improvement ideas or asking the director if the timing needs to be followed exactly.
    • The cloud effects seem to be a little bit fast and I think it could be something that gradually speeds up, rather than starting out fast straight away. I will wait for Amy to add the lightning effects before possibly updating these.
  • Next week:
    • I will be working more on my final film.

Sunday 7 March 2021

Extended Practise: Live Briefs/Competition

 Extended Practise
DTIYS (Draw This In Your Style) Competitions


  • This week:
    • I worked on a few Draw This In Your Style competitions, over on Instagram, to expand my audience on Social Media and development my drawing skills.
  • What went well/What Could be Improved:
    • I worked on two challenges this week, each with winners prizes. I found the first challenge particularly difficult, as I decided to go out of my comfort zone and make an animated illustration. It was also of a human character, which I find more difficult to draw than animals. 
    • I enjoyed working primarily in Toon Boom Harmony for this and used the drawing layers to make sure each part of the face and body could be animated. However, as it was done in Toon Boom Harmony, I couldn't do much painting and struggled to push colours.
    • Here is the final looping animation:


    • The second DTIYS Challenge I took part in was of @Puffygator, which is an artist I have followed for a long time! After taking note of the previous challenge I did, I decided to focus on the illustration side and create this in Clip Studio Paint. 
    • I purposefully chose to use a different brush to what I am used to using and experimented more with brighter colours. I definitely had a lot of fun with this piece, as I was able to experiment, but stay within my comfort zone with the character.
    • Next time, I think I would focus on the anatomy and style of the character, now that I have experimented with the painting and colour.
    • Here is the final piece:


Friday 5 March 2021

Extended Practise: Weeklies Feedback Adjustments

Extended Practise
Weeklies Feedback Adjustments for Final Film


  • This week:
    • We received feedback on the progress of Aviation Aggravation.
  • What went well:
    • The tutors and class believe that the animation is coming along really well. The character animations work well, the backgrounds are looking very professional and they have been impressed by the workflow we have.
  • What could be improved:
    • I needed to adjust Shot 4, as Geoffrey's lines seemed slightly thicker in comparison to the cat in the front. I did this by converting the vector lines to pencil lines, then adjusting the size, then converting it back to a vector brush. 
    • Here are the lines before and after:


Lines Before


Lines adjusted

    • The tutors also believed that the jump of the mouse didn't fit the overall animation style we were going for, so I re-animated the jump, rather than using the tweening style.
    • I still think this shot could be further adjusted, but I will need further feedback for that.


Shot 6 Before


Shot 6 Improved


Thursday 4 March 2021

Extended Practise: Kingdom of Masks Scene 20 Inbetweens

 Extended Practise
Kingdom of Masks Inbetweening Process

  • This week:
    • I worked on Scenes 20 inbetweening for Khoa and Amy's project.
  • What went well:
    • As I wanted the Mask Maker's head turn to ease in and then out, I had to make sure the spacing of the middle frames worked to ease the head. I also, to make the movement feel more fluid, inbetweened the head making an arching motion down, to look up at the sword.
    • Despite finding it difficult to keep the mask the same size and consistent between frames, I found using the shape-making tool helped a lot with this. I could then manipulate the lines with the mouse tool, to keep the shape even.

  • What could be improved:
    • Despite the camera movement added prior to my inbetweening, I think it should ease as his head turns, to then zoom into the sword. The flow of the turning movement feels broken when the camera zoom follows.
    • I think he slows a little bit too much at the end of the turn, which could be fixed by adjusting the timings or removing some frames. However, Khoa believes that the timing works fine, so I will be keeping it this way.
  • Next week:
    • I will be re-keyframing Scene 21, to make improvements!

Wednesday 3 March 2021

Extended Practise: Final Film Inbetweens Progress 3

 Extended Practise 3
Final Film Inbetweens Progress 3


  • This week:
    • I worked on Shots 10, 14 and 15 for Aviation Aggravation.
  • What went well:
    • As these shots were mainly focused on smaller character movements and expressions, I was able to develop my skills in animating head and facial movements. I find it difficult sometimes to animate detailed movements, as these are much more subtle, but necessary to make the character feel believable. 
    • For example, the small frown before he turns his head back to the screen in Shot 10:
Shot 10 Inbetweens

    • As Shots 14 and 15 were keyframed together, I had to work a bit longer to get these inbetweened. I had a lot of fun using smear frames for this scene, as I had learnt a lot about using them before. I made use of them when he lifts his head up and also turns his head from side to side. It makes the movement feel smooth, despite there only being one frame between the two.
    • I struggled initially on the part where Geoffrey holds his laptop in panic, but when I included a smear frame and a slight bounce, it made the action feel better. 
    • We, then, had to use the Shake effect node for the camera, rather than animating the camera shake ourselves. This made it much more consistent.

Shot 14 and 15 without Shake/Camera Changes


Shots 14 and 15 Final Inbetweens

  • What could be improved:
    • I think the smile at the beginning of the shot could be much smoother, to feel more consistent with the rest of the shot. 
    • The timing of the actions could be a little better, as it rushes through. There should be some room for a pause, or holding his reaction more. This is something I'll need to think about next time I plan a project/storyboard and maybe flesh out the storyboard more, to consider the timings.
  • Next week:
    • I will be working on Shot 16 and 18.