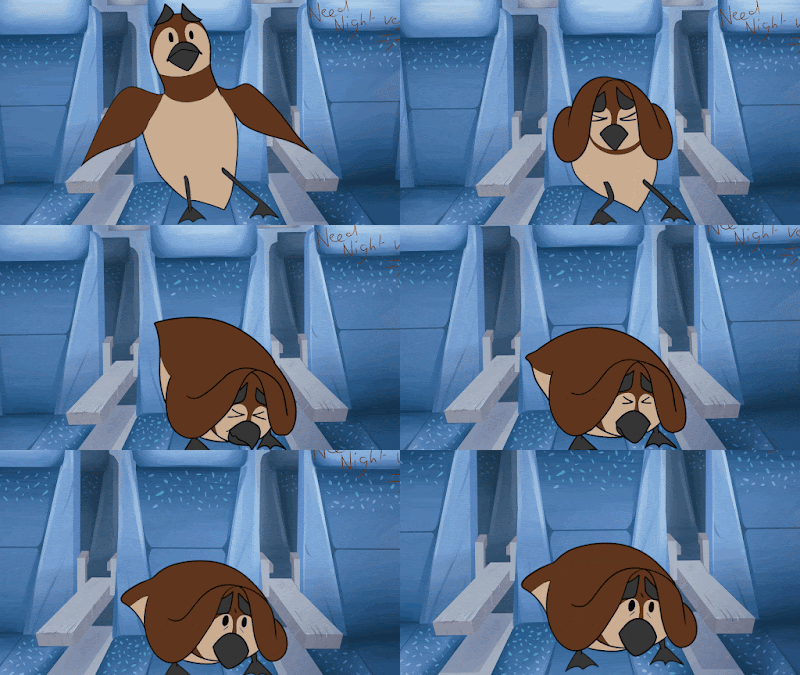
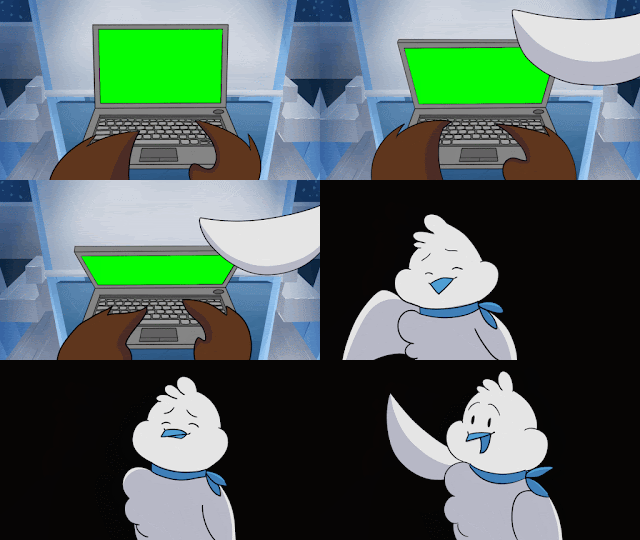
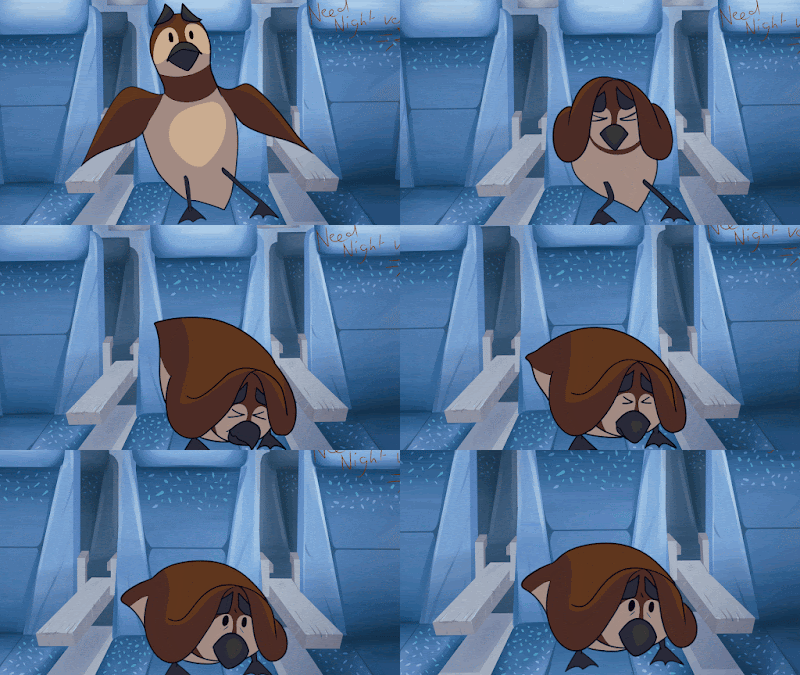
Friday 30 April 2021

Professional Practise 3: Updating my Showreel

 Professional Practise 3
Updating my Showreel


  • Tim Dillnut Showreel Notes
    • I contacted Freelance 2D Character Animator, Tim Dillnut, enquiring about his recommendations for showreels. I told him I will be graduating in July, so he gave me some great advice on how I could put together my showreel. 
    • Here is the list he gave me:

    • I think I already tick a lot of boxes with the work I have produced so far at University. In addition to this, I think I cover some of the senior roles, such as Variation of 1s, 2s and 3s, various types of characters and differing styles. Despite this, I still need to further refine my work as clearer visual examples of these, after graduating, through a series of tests or my own personal projects. 

  • Edd Benson Showreel Notes
    • I additionally contacted Edd Benson, a Junior 2D Animator currently working at Blue-Zoo Animation. He offered a lot of advice, despite being a 3D Animator and sent me towards a YouTube video of a showreel talk and review. Whilst this is mainly for 3D Animation, I feel that I could take on board a lot of the advice. 
    • One great piece of advice from the talk was, "Don't make a reel of walk-cycles" which I think applies also to showing a variety as much as I can. This is why I would like to separate character animation and show a variety of shot types and movements. 
    • Here is the talk he directed me towards:

    • Edd also gave his own advice with, "something high energy," which would grab a studios' attention. I decided to include some acting animation to start with, from my COP Module and Aviation Aggravation. I wanted to separate this with The Monstrous Children Documentary animation and inbetweening I completed for Kingdom of Masks. I think this starts out the showreel with high energy and instantly would grab the viewer's attention. This timed with the music also works really well, so it works as a great opening to the showreel.

  • Creating my 2D Animation Showreel:
    • I liked the idea of using the music creatively in the showreel. I understood that this might not be something a lot of employers/studios listen to, however, for the purpose of my general, online showreel, I thought it would be best to try this method. 
    • In addition to this, I wanted to expand upon my previous showreel from last year. I am still proud of a lot of the work I produced and I think that they do feel relevant in my current work. 
    • In my showreel, I needed to include my branding. I tried this by adding a red box at the bottom for a subtitle, indicating my role. I additionally changed the title to include my website colours and the end of the presentation utilising the red again. 
    • Unfortunately, we needed to limit the showreel to 1 minute, therefore I had to cut down on the work I put into it. I was going to try including my work in progress scenes, which would fade into the final shot, however I had to scrap this because of the 1 minute time limit. I will adjust my showreel in the future to include this. 
    • Here is my end of year showreel:

    • What could be improved:
      • I think there could be more examples of character interactions in my showreel, as there are little to no examples of this. I would need to animate something after University work finishes, as a study, to help add this missing element.
      • Some further acting examples would help solidify my skills much more, so this is something I would like to work on in the future.

Wednesday 28 April 2021

Professional Practise 3: Researching UK Studios

 Professional Practise 3
Researching and Applying for UK Studios


  • I had previously found a website which has a list of Animation Studios based in the UK, located here: https://onelightvfx.com/studio-list/complete-list-of-2d-3d-animation-post-production-and-vfx-studios-in-england/.
  • I decided to look through this list of studios to find potential roles I could apply for and send in my CV and Portfolio to them!

    • Team 17 - Wakefield
      • As I live close to the Team 17 Studio in Wakefield, I will be keeping an eye on the positions opening there. I think it would be a great opportunity to work in a games studio and they usually make 2D games, or are looking for 2D Concept Artists.
    • Aardman - Bristol
      • Aardman are currently looking for a 2D FX Animator for their newest series. As someone who has done a lot of 2D FX for multiple projects this year and over the past couple of years, I think it could be worth trying to apply for!
    • Blue-Zoo - London
      • Blue-Zoo frequently have entry positions open. They currently are only looking for experienced Harmony animators, however. https://careers.blue-zoo.co.uk/vacancies/192/toonboom-harmony-animator-experienced.html
    • A Productions - Bristol/Remote
      • Storyboard Positions: https://aproductions.co.uk/jobs/storyboard-artist-beas-block/
      • Studio Runner: https://aproductions.co.uk/jobs/studio-runner/
        • I have applied for their Studio Runner role!


    • Lolly Studio
      • Lolly Studio were looking for a Illustrator/Animator with a strong sense of Character Design. I have applied for this role, as it doesn't specify how much experience is required. 


Monday 26 April 2021

Professional Practise 3: Fresh Egg Collective Studio Branding

 Professional Practise 3
Fresh Egg Collective Studio Branding


  • Last time, Joseph and I decided to keep the idea as a Collective going forwards. So far we have interest from Rachel, Caitlin, Emily, Stacey, Amy and Rhys to take part in the Collective, however everyone has noted that they want to wait and see what positions they will be in post-graduation, due to the current Pandemic and external circumstances with whether they will be remaining in Leeds or returning home.
  • We have, however, agreed that we would like to work on another film post-graduation as a starting point for the Collective. This would allow us to better understand each others' work ethic and how we can develop our presence going forwards. As part of this, I designed a mascot and the group chose a colour scheme we could work with.
    • Here are some initial mascot designs:

    • The favourite mascot of the group is the one at the very top, with the half-egg head and yolk body. I decided to develop this into a final mascot:
    • We also put together a Discord, so we can continue to communicate after University has finished!


    • As further research for the Collective, as we decided on the possibility of creating another film together after Graduation, I found several books which explains the budgeting process for a film or studio. The first book, "The Animation Business Handbook" by Karen Raugust provided some great information on salary averages, budgeting for a film, creating merchandise and animation in international markets. I found the sections about film budgets the most interesting as it spoke about online film budgets. However, I would note to take this book with a grain of salt, as a lot of the statistics are taken from 2001, of-which the industry has changed enormously since. 
      • I additionally made notes on "Producing Independent 2D Character Animation: Making and Selling a Short Film" by Mark Simon. I found this research more beneficial, as he had produced his own films and animations for festivals. He, additionally owns his own studio. I focused on the sections about budgeting, copyright and festivals.
    • Here are my notes:


Friday 23 April 2021

Professional Practise 3: Study Task 5

 Professional Practise 3
Study Task 5 - Create Your Brand

  • Online Presence
    • As part of my re-branding I decided to create a new colour theme and completely re-brand my entire online presence, to move away from the "Faye Scribbles" brand, which was much less professional and something I had created in my early teens. Upon changing my brand name to "Alinaydra," I also decided on a new colour scheme and updated my profile to reflect this change. I have since re-branded my old YouTube channel and created a new channel, under the name "Alinaydra" where I will be posting future animations.
    • Here are the new brand colours I decided upon:

    • I think that these reflect my art-style and online presence well, because of the bright, warm and saturated colours, which I also use within my art. The blue-green colour also works well as a complementary colour and contrast, to add details into my branding. I will be using these colours for my Portfolio, my Showreel, my Branded CV and my Business Cards.
    • For my portfolio, I had already put together a Wixsite, however I needed to change the branding entirely. After a 1-2-1 with Michaela, we went through the branding and layout and she gave me plenty of feedback on changes I could make.
    • Here is the feedback notes I made:

    • My Portfolio went through a lot of different ideas, because I wasn't entirely certain which colours to use as the background and what to use as the text colour. The website went through different iterations. This is one that I had initially liked:
    • However, I wasn't sure if I liked the black text on the yellow background, therefore I made changes and swapped colours around. I think I preferred the white text on the yellow background, instead. 
    • I, then, needed to go through and adjust a lot of the portfolio layouts, change the text to "Oswald" as title text and "Roboto Light" as main body text. These are two typefaces I used for the rest of the branding. 
    • At the moment, the portfolio has the Wixsite banner at the top. When I have been through the Wix subscription, I found that it might not be entirely worth the price. I shall be keeping my website on Wix, for now, however I will be looking into other web domains and builders to change to.
    • Here is the final portfolio layout, located at alishafayelittle.wixsite.com/portfolio:


    • I wasn't sure how to apply my branding to other social media sites, such as YouTube, Twitter and Instagram, therefore I decided to create a digital banner to fit with the branding overall. 
    • Here are the first digital banners I created:


    • I didn't think these worked well beside the website and with the parallel blocks either side, it didn't look how I wanted it to. Therefore, I decided to simplify it and use the green as a solid background to the yellow, red and white banner. I think this worked much better and the simplicity of the banner stands out more.
    • Here are the final banners:


    • Social Media Presence:
      • With the updated Banners and Profile pictures, I additionally updated my Twitter, Instagram, YouTube and LinkedIn to all fit with my branding:
Twitter

YouTube

YouTube Branding

Instagram

LinkedIn

  • Printed Materials
    • For the printed materials, I created two CVs (one branded, the other a fully written one). For the branded one, I had feedback from Michaela, which allowed me to make final adjustments. Here is the initial feedback from Michaela, after my first draft:
    • I had also sent my written CV to Careers to be reviewed and updated the CV according to their feedback, also.
    • Here is the written feedback from Careers:
    • I wanted the final branded CV to be colourful and simple. I used reference from looking at other artist's CVs and they tried to keep the branded one limited. 
    • Here are some example CVs I used:


    • Here is my final branded CV and written CVs, based upon my feedback:


    • Furthermore, I created a business card for my brand, following, again, the brand colours and typefaces. As I had created a lot of business card ideas, I put together a PDF of all of the revisions the cards went through.
    • I wanted to also include some original art onto the business cards, therefore I added some character illustrations of a character I draw often, and post often to my social media. I additionally think it went well with the colour scheme and provides a glimpse into my personality. On the back of the card, I additionally created a QR Code, with a link to my show-reel.
    • Here is the development of my business cards:
    • Here is my final business card:
Front


Back


  • Final Branding Booklet:
    • Here is an overview of all of my branding:

  • Going Forward:
    • I will be consistently updating my business card and portfolio, to fit with the work I will be doing in the future. This would mean updating the QR Code for my most recent show-reel and updating the Portfolio frequently with new work. I will be continuing to use this colour scheme and branding in the future, but I may make further adjustments as time goes by.
    • Unfortunately, the Wix-site subscription to remove the ad at the top of the page is under the premium subscription. I tried to pay for the base amount, along with a separate domain, however I realised only after that the Wix banner counts as an "ad" therefore, I didn't know you had to pay the full amount. I will be changing my website domain after submission, by transferring my website to a different web-service provider.


Sunday 18 April 2021

Extended Practise: Final Evaluation

Extended Practise
Final Evaluation


  • This week:
    • I finished up the final post-production for Aviation Aggravation, The Last Riders and Kingdom of Masks!
  • Here is my final evaluation:

  • Next time:
    • I will be putting together my final submission for 603!

Professional Practise 3: Researching Career Paths

 Professional Practise 3
Researching Career Paths


  • As part of my Study Task of my exit strategy, I decided to explore possible career paths and do some further research into ways I might need to tailor my show-reel/portfolio for roles.

  • Entry Animation Positions
    • Entry Level Animation Positions would consist of "Junior" titles in the job description. It's also worth looking at the years of experience required for the role. Blue-Zoo Animation tends to offer entry positions, which they label on their careers website. They also frequently post positions to their Twitter page!
    • I will frequently check this page for positions.

    • In their most recent tweet, they talk about the day-to-day focus of animators, which timing seems to be important, acting choices and meeting deadlines. I think I have met these skills within my 603 module, which will be evidenced in my portfolio. They have labelled both "Entry-Level" and "Junior" positions separately, which leads me to believe that they think Junior positions require slightly more experience than "Entry-Level" animators.
    • In addition to this, I found an opportunity on LinkedIn with Boulder Media, which are an Animation Studio based in Ireland. They are starting an Animation Training Bootcamp for graduates, which I will be trying to apply for. I had previously tried to apply for some positions in Ireland before, however because of the UK no longer being an EU Member, they specify that EU Citizens can only apply. I will still attempt to apply anyways, as it doesn't state where you need to be based. 

    • In a talk with Golden Wolf, they stated that they frequently offer Internships, which is something I would like to consider. I don't believe my show-reel completely fits within their style of animation, however it is something I would like to consider. Something I could develop is a separate show-reel specifically for their style of animation. This would require me to develop further character animation for my show-reel after graduating.

  • Where I can go after getting into the industry
    • I messaged Isobel Stenhouse on LinkedIn to talk to her about how she changed her roles so easily within industry. She was incredibly kind and supportive and provided really great information about going forward. She told me about just having a specific focus now, to put my energy into and then once I am in industry, I have the ability to switch roles if I'd like to. This is one of the reasons why I would like to, whilst improving my 2D Animation, continue to develop my Concept Art, Illustration and Storyboarding skills.

  • Possibility of Storyboarding
    • After Kate Lander's talk, she spoke about Storyboarding Apprenticeships (Level 7), which is a possibility of something I could do. I haven't heard anything about this apprenticeship since Kate Lander's talk, however she had mentioned that we needed to contact studios enquiring about this.

Saturday 17 April 2021

Extended Practise: Aviation Aggravation Final Film

 Extended Practise
Aviation Aggravation Final Film


  • This week:
    • I edited the final composite for Aviation Aggravation and put together a press-pack for the film.
  • What went well:
    • We were able to finish the final composite for Aviation Aggravation ahead of schedule! This allowed us to put together a quick press-pack and Rachel put together an amazing Art Book for Aviation Aggravation.
    • Rachel and I also worked on a poster for Aviation Aggravation. She contributed to the layout and linework, whilst I coloured, shaded and edited the poster. Here is the final film poster:

    • When preparing the film and putting together the final touches, I referred back to my notes from Steve Henderson's talk about submitting to Film Festivals. He mentions to make sure the editing is perfect, so I had to keep going back to the final composite and making adjustments. I think I will still be making minor adjustments, if I find some errors, even after submission, ready for festivals.
    • Here are my notes from Steve Hendersons' talk:
    • Overall, I'm proud that we were able to finish the full film, despite the circumstances, having to balance the workload between other projects and how many changes the film went through. I think that I learnt a lot about directing a larger-scale project and it's definitely something I would consider doing again in the future, based upon the experience I'd gained making this.
    • I think the characters work very well and fit into the backgrounds. The colours and expressions definitely stand out in this project, which is something I wanted be a focus. 
    • The music adds a lot to this project, thanks to Ben Hywel-Davies, who we collaborated with for the film.
    • Here is the final animation:

    • Here is the Press-pack, ready for festivals:

    • Here is the final art-book for the project, put together by Rachel:
  • What could be improved:
    • I wanted the character animation to be much more expressive and animated, however considering the amount of time we had and the amount working on the team, it would have been tricky to achieve. I will be considering this in future projects.
    • Some of the shots could have been positioned and composed a bit better. I think that there could have been more variety in the positioning of the camera, especially because it seems to always be just directly in-front of Geoffrey or showing a medium shot of the characters. This was tricky to get around with the space within the airplane being quite confined. 
    • The overall writing of the story could have been more creatively done to cut down on the time of the film, as we had to run over to hold frames for a bit longer - the initial cut felt like it was moving too fast, so we had to change this. I will consider this in the future, when storyboarding.
  • Next time:
    • Once the project has been submitted, we will begin looking at submitting to Animation festivals!

Friday 16 April 2021

Extended Practise: Kingdom of Masks Final Film

 Extended Practise
Kingdom of Masks Final Film and Evaluation


  • This week:
    • Khoa put together the final composite for Kingdom of Masks!
  • What went well:
    • As I had contributed a lot to this project, I was very proud of the amount of work I did and how I was able to balance this with another project. I, also, had to balance and organise my workload for the Post-Production, as I was working on three different projects at that point. 
    • In terms of my contribution of 2D Animation, I think that I have improved significantly in animating human characters, of-which the Mask Makers' design is quite complex. We experienced issues with some members of the team not following the reference sheet too well, so when it came to inbetweening some scenes, I wasn't sure whether to follow the reference or follow the keys, to keep the animation visually appealing. 
    • I think that my inbetweening skills have improved greatly over the course of this module, as I was becoming more aware of the forms moving, how to space and time inbetweens in order to achieve a specific movement and using smear frames for faster movements. I made use of both the Pencil and Brush tool for inbetweening in Toon Boom Harmony and learnt a lot about close-gaps, the clean-up process, colouring and trying to speed up my animating process. I, additionally, contributed to 2D VFX with the clouds of steam and smoke coming up when he pulls the sword out of the stones.
    • I learnt a lot with post-production also, such as using the Puppet tool, using lighting effects, noise effect, etc. which is a great improvement from the editing I did last year.
    • Here is the final film:
  • What could be improved:
    • There was a lot of stresses with this project, with the scale of it and the ambition. I think that I could have contributed much more with the 2D Animation, as I would have liked to do more keyframing or roughs, to improve my animating skills in faster-paced action sequences. This is something I would like to learn to do in the future, so I will be practising once I graduate.
    • I would have liked to be more exaggerated and expressive with the movements of the Mask Maker, however as my main role was inbetweening, it was tricky to do with how it had been keyed. Again, this is something I'll need to practise alone.
    • I need to improve on my use of the Puppet tool, as I had a few problems with it in Post-Production. I either over-used it or under-used it and I think it would be worth experimenting with it, with multi-layered characters.

Extended Practise: The Last Riders Final Film

 Extended Practise
The Last Riders Final Film and Evaluation


  • This week:
    • Rhys put together the final composite for The Last Riders!
  • What went well:
    • Overall, I think I improved a lot in my compositing skills, specifically in Adobe After Effects. I had learnt a lot about importing PNG Sequences and adjusting frame-rates so that it avoids "ghost" frames in the render windows.
    • This project also allowed me to practise editing lighting effects and add light wraps, which is something I will definitely be using again in the future. I found that it forced me to problem-solve, as there were a few scenes I needed to edit which didn't have the layers separated or there were several problems come up within the project file. For example, when adding the mist to Marow, or learning how to properly add a light wrap. 
    • All of these skills are incredibly helpful going forward, as it allows me to understand the workflows in post-production and what I would need to do in the production stages, to avoid problems in post.
    • Here is the final animation:
  • What could be improved:
    • In terms of my contribution to the project, I think that I could have scheduled myself, or managed the work-load better, and taken on the full post for this project. This would have allowed me to be more consistent between lighting on scenes and I could experiment more with the compositing. As I had joined the project at a later stage, I didn't have much say in the production part, therefore I had to address problems during the Post-Production stage. This is something I will consider in future projects.
    • I think I could have been more experimental and challenged myself within the software. I did this with several scenes, however this is something I could have done on multiple scenes. Again, this could've been established before the post-production stage, however as I had joined the project later, it wasn't initially discussed.

Thursday 15 April 2021

Extended Practise: Final Film Post-Production

 Extended Practise
Final Film Post-Production


  • This week:
    • I worked on the Post-Production and VFX for my Final Film.
  • What went well:
    • Emily put together a Gantt Sheet for Post-Production for both Joseph and I, as we were sharing the work for Post. I found this incredibly helpful, as I usually wouldn't schedule my time for Post-Production, but as I had multiple projects I was doing Post for, this was particularly helpful.
    • Here is the Post-Production Gantt Sheet, made by Emily:

    • We decided to split Post-Production by Scenes and location, therefore Joseph took the Post and VFX for Shots 1-14 and I took the VFX for Shots 15-23. When it came to editing the transition between 14 and 15, Joseph edited 14, within his composite and exported it, so then I could add the lighting to Shot 15. This method worked very well!
    • Using what I had learnt doing Post-Production on other projects, I found the process less daunting, as I had a general idea of lighting VFX I could add. For example, using Masks so I could add the light of the laptop and a Light Sweep for light coming from above him:

    • I used a blue solid overlay to increase the contrast of the colours and make the scene feel like it's set at night. I think this effect worked really well.
    • I applied a contrast and shadow adjustment to the part where the Air Hostess leans in to the camera. Also applying a Light Sweep really helped with the contrast and ambient lighting. Here is what this looked like:

    • This contrast of colour worked really well, especially when I made a change of colour when the plane starts to experience turbulence. With a flash of light, the colours change to a flashing red, which really adds to the drama of the situation. 

    • Overall the lighting and colour changes really helped with the story-telling and in conjunction with the music and foley, it works very well. 
    • In addition to adding lighting and colour effects, I decided it would be better to add a Post-Credits to the animation, rather than try rushing the credits over the final couple of shots. I also believed it worked better for the type of animation it was, as a childrens' animation. I researched a little bit for this and I found this website which talks about "Creative Closing Credits", with a section for Animation, which can be found here: https://tvtropes.org/pmwiki/pmwiki.php/Main/CreativeClosingCredits. The idea of Disney Pixar's Ups' closing credits using the scrapbook really stood out to me. I decided to add something which could reflect the airport themes, so I created a series of  Passports for the characters.
    • Here are the character Passports:


    • I created five passports to make sure I had enough to come on-screen when I was making the credits. Here is the final end-credits I composited and animated in After Effects:

    • As I had composited all of the lighting and VFX for Shots 15-23 within one After Effects project, it made it easy to copy effects from one composite to another. I additionally could make use of Pre-composites to keep lighting consistent between scenes. This made the process much easier, so then I could export the final composite as an MP4 of Shots 15-23.
    • Here is the final composite of my post-production:
  • What could be improved:
    • I have noticed some errors in the animation, which will need updating. I will adjust these before I put the final composite together. These are:
      • The animation of the Air Hostess jumping backwards is the wrong version. I will need to re-shade this shot and re-import it.
      • The laptop is floating in the shot of Geoffrey looking down at the laptop, I will need to go into that shot and draw in Geoffrey's body and feet, so it's resting on him, rather than floating in the air.
      • The background for the Airplane in the very last shot seems to have an error with the railing of the stairs. This needs to be also adjusted in the Toon Boom File and re-exported.
  • Next time:
    • I will be adding the final adjustments, then compositing the final scenes together with music and foley.

Wednesday 14 April 2021

Extended Practise: Final Film Shading 4

Extended Practise
Final Film Shading 4


  • This week:
    • I worked on the final colour for Shot 19 and the final shading for Shots 19, 21, 22 and 23.
  • What went well:
    • As I hadn't coloured a lot of Shots for Aviation Aggravation, I was glad to be colouring Shot 19, as this allowed me to make use of the Stroke tool to create Geoffrey's markings. I think I was quite accurate and consistent with the markings on his face, as I was worried about them being wobbly. Using a flipping-frame technique, I was able to keep them very consistent.
    • Here is Shot 19:
Shot 19 Colour
    • As I was working on Shot 19 Colouring and also the shading, I was able to quickly add the shading after I'd finished colouring.
    • Here is the shading for Shot 19 also:

    • For Shots 21, 22 and 23, I followed the same shading process using the cutter tool. I think that I have kept the shading style very consistent between scenes and it adds a lot of polish to the final animation.
    • For Shot 22, Joseph and I tested adding the Air Hostess in the background, however as she was just a still it felt out of place in the animation and we preferred it without her in the back. If we had extra time, we would have fully animated her, but we unfortunately don't have enough time to add this.
    • Here is Shot 22 with and without the Air Hostess:

Shot 22 without the Air Hostess


Shot 22 with the Air Hostess
    • Here is the final shading for Shots 21 and 23:
Shot 21 Shading

Shot 23 Shading

  • What could be improved:
    • I prefer the high contrast lighting used in Shot 22 with the Air Hostess, rather than 22 without her, therefore I'll probably adjust the contrast and lighting in post-production for this shot.
    • The final backgrounds need to be added to each of the shots and I think some further editing in Post-Production to add contrast and lighting will really help bring each of these scenes together. I will consider this when I start editing, this week.
  • Next time:
    • I will be exporting each of the scenes and starting editing the final animation.

Extended Practise: Kingdom of Masks Post-Production 3

Extended Practise
Kingdom of Masks Post-Production 3


  • This week:
    • I worked on the compositing and VFX for Still 13 and Scenes 24-25 for the Kingdom of Masks project.
  • What went well:
    • As I had learnt from the previous edit I did for Stills 17 and 14, where less is more, I decided to apply this to Still 13, as it was to be edited in the same way. I think that by applying the Puppet Tool and just giving him a subtle swing of his arm, in slow-motion, it works much better as a subtle effect. 
    • Here is Still 13:
    •  As a last-minute addition to my Post-Production schedule, I was asked by Emily and Khoa to try to composite and animate the transition between Scenes 24 and 25. I found this process quite tricky, as they wanted Scene 24 to go into a crystal ball, which the Fairy in Scene 25 is looking over. However, as I had learnt a lot about using masks and pre-composites, I was able to create an animated mask for Scene 24 and animate the light/VFX so it looks like it is inside a crystal ball. 
    • As I had a better understanding of animating applied effects in After Effects, due to my work on Post-Production on Rhys' and Khoas' projects, I found the process much easier.
    • Here is the transition from Scenes 24 to 25:
  • What could be improved:
    • The time stretch I added to the end of Scene 24, in order for the transition to work better, could be further improved, as it holds for a little bit too long at the moment. Either this, or have better planned that there would be a transition here, so the slow-motion jump could be animated and extended further.
    • Furthermore, the zoom of the Fairy and Scene 24 is slightly out of sync, however this was very tricky to have them moving perfectly, as I also needed to scale the Scene. This could have been something I fixed with a pre-composite, instead of using a mask. This is something I will consider for future projects.
  • Next week:
    • Khoa will be putting the final animation together, ready for submission!

Tuesday 13 April 2021

Extended Practise: Final Film Shading 3

Extended Practise
Final Film Shading 3


  • This week:
    • I worked on further shading for my final film.
  • What went well:
    • Using the same method as previous scenes, I added shading to Shots 8, 12, 16 and 17.
    • As these were shots on the plane, I took into consideration the different sources of lighting when Geoffrey sits down and I needed to also take into account when the scene changes from day to night. I think I did a great job of establishing where the light sources are and keeping consistent with the shadows this way.


    • Shot 16 and 17 are a great example of where I paid attention to the lighting changes within the scene. For example, in Shot 16, I made sure the Hedgehogs were lit from above, as there would be a light above them.
    • For Shot 17, I tried to make the shadow move as he approaches the window, to lift the blind. I think this adds a lot to the believability of the world and makes the characters feel more interactive with the environment. This is an approach I decided to take for further shots going forward.


  • What could be improved:
    • I think in future projects, I could consider varying the shading for different scenes with different lighting. This could potentially take form as different colours used for the shadows, or changing the intensity of the shadows depending on how close a character is to a light. Shot 17 could benefit from this, as he moves closer to the window, the shadows become more intense. This is something I will consider in future projects, now that I understand shading workflows and different methods I can use for shading.
  • Next week:
    • I will be working on the colour for Shot 19 and the shading for Shots 19, 20, 21, 22 and 23.

Monday 12 April 2021

Extended Practise: The Last Riders' Post Production 3

 Extended Practise
Rhys Post-Production 3


  • This week:
    • I continued compositing scenes for Rhy's project 'The Last Riders'.
  • What went well:
    • I worked on Scenes 13, 25/25.2, 4 and 27.
    • Following the same process as previous weeks, I started working firstly on Scene 13. This was one of the most difficult scenes I needed to work on for Rhy's project, as the file given to me was just a composited MP4. Rhys wanted me to apply the misty glow effects to Marow, to remain consistent with previous scenes, however the background was within the MP4 file.
    • Here is the clip which was sent to me to edit:

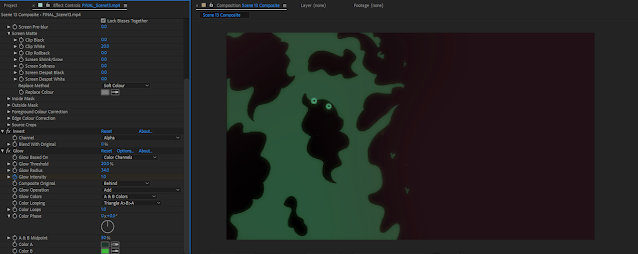
    • I wasn't sure at first how I was going to edit this, however I enjoyed the challenge of trying to add the glow to the mist, despite having uncertainties about it being possible to do. My idea consisted of making use of Keylight to try isolate the green colour of the mist and then finding a way to add a glow to that selected zone. By using Keylight and adjusting the clipping white of the Screen Matte, I could isolate that one colour.
    • Here's what this looked like:

    • I, then, applied an invert, so that it would invert the Keylight and select only the green areas:

    • To this isolated section, I could apply a glow:


    • I, then, imported another layer of the original clip, so that the glow mist effect would just overlay it. Overall this process was quite tricky to figure out, at first, but I'm incredibly happy I was able to figure this out and this is definitely a process I will use in the future.

    • Here is the final clip for Scene 13, after making further adjustments to Marow's eyes, upon Rhy's request:
    • As I was getting much quicker with editing, due to the repetition of the process and applying the same compositing effects to each scene, I found compositing Scene 25 and 25.2 quite simple. For Scene 25, I used the same lighting process and in Scene 25.2 I added a slight green glow to the background, which is illuminated from Marow's mist. 
    • Here are Scene 25.2 and 25:


    • For Scenes 4, 21 and 27, I followed the same lighting process as previous scenes and, again, this process took me much quicker than I had initially anticipated, because I was understanding the workflow better.
    • I added shadows to Scene 27, casted by Marow and Isla, as this would keep consistent with Scene 26 (which had a shadow cast over Isla). 
    • I also added shadows to Scene 21 and a Light Ray onto the glass. I took into consideration the improvements I wanted to make from last time, which was taking the Scenes lighting more literally. As it was close to the window, I thought the light would be harsher and the glass would reflect a lot of light. 
    • Here are Scenes 4, 21 and 27:


  • What could be improved:
    • In a few scenes, the lighting feels slightly inconsistent, because of the way the overlay is reacting to different backgrounds and characters in scenes. This would be greatly improved if I had multiple files open, so that I could adjust the opacity and colours based upon another scene I had edited. Having another file open as reference would help reduce the inconsistencies between lighting in scenes. I will consider this going forward in other projects.
    • Similarly to my improvements on previous posts, I think the colour used for the lighting doesn't work too well and feels too dark for something that's supposed to be a light. 
  • Next week: 
    • Rhys will be putting together the final animation!