Thursday, 30 April 2020

Applied Animation: Documentary - Fenrir Puppet Animation

Applied Animation
Fenrir Puppet Animation

  • This week:
    • I worked on the final shot of Fenrirs' scenes, which is puppeted animation in Toon Boom Harmony.
  • What went well:
    • I was able to recreate an effective slow-motion shot, using multiple layers in Toon Boom Harmony, similarly to how I created the slow motion animation for Jormungandr. 
      • This included puppeting each body part and I had effectively learnt how to rig, so the drag on his paws were created with this method.
    • My first attempt included a few frames showing his head facing down, before he lifts up and it felt quite jarring, so I removed this when I animated the anticipation shot before, as that already demonstrated that movement.
First test

Removed beginning frames

  • When I added snow, it really helped to amplify the movement of his paws coming up from the ground and flicking up the snow, into the air. Once that was approved by my group, I could start on the fetter animation, which proved the most difficult, as I needed to animate it as though it was moving in slow motion.


  • Adding effects, such as the glow, made the fetter stand out more, and implicate it's special qualities, visually. 


  • What could be improved:
    • The width of the fetter needs to be adjusted, as it's too wide at the moment. I'll be doing this before re-exporting, to make sure that it is consistent with Caitlins' frames.
    • This shot could be further improved in post-production, with slow-motion mist effects and slow motion falling snow, which Joseph and I will be creating in After-Effects.
    • Finally, this can be further improved to fit in better with the shots before and after, with a snow fall transition effect. I will be experimenting with this next week.
  • Next week:
    • I will be exporting the animation work so far to prepare for post-editing. I need to finish some final details, such as transitions and last-minute edits to the animation.

Saturday, 25 April 2020

Applied Animation: Documentary - Fenrir Colouring and Shading 2

Applied Animation
Fenrir Colouring and Shading 2

  • This week:
    • I worked on the anticipation shot of Fenrir and start the puppet animation.
  • What went well:
    • I smoothed out the frames from my previous post and started the colouring process for Fenrir. This process has gotten easier since I started using Toon Boom Harmony, as I have gotten more used to working in the software.
Colouring and Shading Frames:

    • The shading is consistent and the added highlight, using the previous method from my Jormungandr scenes, helps break up shapes.
    • Additionally, animating the chains were a lot easier, as I already had drawn the assets for these and just needed to puppet them again, using the peg tool and rigging. 
Puppeted Chains:


    • I noticed that the last few frames needed to be extended a little bit, as it moves too quickly to see what's happening. Whilst extending these, I added a slight snow flick and steam from his breath, to keep consistent with the previous shot. The snow flick also illustrates the speed at which he lifts himself up, as the snow drags up with his paws.
Added Breath linework and snow:

 Coloured and Blurred Breath:

Slowed final few frames and moving shadow:

  • What could be improved:
    • Fenrirs' leap up to break the chains could be illustrated more clearly, or even continue further before it cuts to the slow-motion puppet shot of him. As this wasn't a fully planned shot, I will keep that in mind next time and plan it more to understand the full movement of the character.
    • I will put this with the slow-motion shot and see if it works fine. If it seems to cut too quickly, then adjustments can be made. 
    • Finally, this could be further improved in post-production, with added snow and moving fog to illustrate the cold atmosphere.
  • Next week:
    • I will be working on this alongside the puppet animation to make them flow together.

Friday, 24 April 2020

Professional Practise 2: Hosted Projects

Professional Practise 2
Hosted Projects

  • As part of my on-going practise and side-projects for fun, I hosted a Multi-Animator Project last year, as part of my side hobby, producing fan-content. I hosted a project involving 25 unique animators, from all ages, who have read the book series and posted the final project to my side YouTube channel. 
  • I scripted, organised, edited and produced the full film, including the colour scheme, aesthetic and visuals, taking two parts of the project myself. The colour scheme was heavily influenced by Taylor Swifts' music video, Look What You Made Me Do, as this is a music video using that song.
  • It features characters and story illustrated from the book series, Warriors. I have produced multiple projects for the series, as this is what initially got me into animation.


Wednesday, 22 April 2020

Applied Animation: Documentary - Fenrir Keyframes and Betweens 2

Applied Animation
Fenrir Keyframes and Betweens 2

  • This week:
    • I worked on more scenes for Fenrir, focusing on Keyframes and betweens.
  • What went well:
    • Before the puppet animation, there is a short shot where Fenrir anticipates leaping up to break the chains. I wanted to spend time making sure this was done before focusing on the puppet animation, for the rest of this week.
    • I used several references of dog movements to help me to understand how Fenrir could lift himself up. I wanted it to seem like he was pushing on his front weight, before shifting the weight to his hind legs, as the references I had looked at seemed to demonstrate this when dogs try standing up. I wanted him to remain in a crouch, however, so when I used references, I needed to keep this in mind.
This reference doesn't have a similar angle, but it did help me to understand this transfer of body weight:


    • I started by keyframing the head movements, with the body and tail on separate layers. When I showed my group my progress, they suggested making the head lowering as one smooth movement, which is what I then changed.
Head movement before:

Smoothed head movement:

    • I additionally noticed that if it was going into the next shot, which is the slow motion, their may need to be additional frames to just show Fenrir lifting the front half of his body. I was able to then smooth out the animation for the body and tail.

  • What could be improved:
    • The movement of the last few frames of Fenrir lifting up needs to be adjusted for timing, which I will look at for the rest of this week.
    • The chain animation needs adding, to remain consistent with the previous shot of him, in addition to the colouring and shading.
  • The rest of this week:
    • I'll be fixing any movements and then colouring, shading and adding any additional VFX to the animation.

Professional Practise 2: Commission

Professional Practise 2
Character Commission

  • These past two weeks I had been working on a commission for Rachel, as she wanted her character drawing in a relaxed pose, with a simple solid colour background. She wanted a detailed illustration of her, so this commission was priced higher to accommodate for that.
  • Here is a screenshot of the conversation, the invoice and the final drawing:


Invoice:

Final Illustration:


Tuesday, 21 April 2020

Professional Practise 2: Year Overview/Learning Journey

Professional Practise 2
My Learning Journey Presentation

  • My learning journey presentation demonstrates and explains the decisions I have made throughout the course of the year and how each of the modules have impacted me. I additionally identify my strengths, weaknesses and what I plan to look at over the summer to help with my work in my third year.
  • Here is the final presentation, my show-reel (from the work I have finished so far) and a recorded version of my presentation:
Final Presentation:


Show-reel:


Recorded Presentation:


Monday, 20 April 2020

Professional Practise 2: Final Animation for LoopdeLoop

Professional Practise 2
Competitions - LoopdeLoop

  • In the group with Emily, Harry and Kathryn, we finished the animation for the LoopdeLoop competition. With the theme, Mushy, I think we did a great job illustrating the idea and putting our own creative twist into the theme. We followed a full workflow for a studio and successfully produced an animation to be entered into the competition!
  • Next time, consistency could be improved and focused on, however it was a bit of a struggle being apart and only able to communicate online. We listened to each others' feedback effectively and produced a small animation to show for that.
Here is evidence of the entry:


Here is the final loop:


Sunday, 19 April 2020

Applied Animation: Documentary - Fenrir Colour and Shading

Applied Animation
Documentary - Fenrir Colour and Shading


  • This week:
    • I worked on the colouring, shading and highlights for one of Fenrirs' scenes. I additionally found ways of improving on aspects I had noted in my previous blog-post.
  • What went well:
    • The colour process was previously quite tedious, as I had not fully understood the software yet, however I managed to figure out and learn some short-cuts and tricks which helped the colouring and shading process speed up.
    • I started by colouring the breath animation and then adding a blur effect to this. This straight away improved the look and appeal of the breath, making it seem more realistic.

    • After quickly colouring the flat-colours, I then went on to shading. This was the longest part of the colouring process, previously, however I had found a better way of colouring, using the select by colour tool. This meant that I could select a line of the same colour and delete it. I drew a red line, with the pencil tool, to indicate where I wanted the shading, went back and filled in the shading and then a third time to remove the red line. This made the process a lot faster.

 Flat-colours:

Select by colour tool in Toon Boom assisted with the shading process:


    • Then, the highlights were added to keep the same consistency and contrast similarly to the Jormungandr scenes. I made adjustments to the tail animation, so it would occur just after Fenrir turns his head, so it's more noticeable, as I had mentioned that in my previous post.
    • Here is the final shot: (the colours are slightly compressed as it is a GIF)

  • What could be improved:
    • I think that next time I do this it will be much quicker and smoother, as some of the shading lines do wobble a little bit.
    • Another thing I wanted to note was the possibility of adding light snow-fall or mist to the scene in post-production, as it would really add more to the atmosphere and illustrate the coldness of the scene. This is something I will keep in mind once the documentary is ready to edit.
  • Next week:
    • I will be working on the puppet animated scenes for Fenrir.

Friday, 17 April 2020

Professional Practise 2: Creating an Online Presence

Professional Practise 2
Online Presence and Websites

  • To further research creating an online presence and creating a portfolio, a book I purchased a while ago, "The Ultimate Concept Art Career Guide," has useful information on online presence, creating social media and what tools available to you, for all artists. Despite being a Concept Art focused career guide, there are useful tips for animation and getting into the film/video game industry. 
    • It features interviews with professionals, explaining how they got into the industry, what they like about it and things to look out for.
  • I made some notes on Christina Lavina Ferez' section, a concept artist who had previously worked for Kemojo Studios, Fathom Interactive and Opus Artz. She provided a series of tips for creating a good portfolio website.


Thursday, 16 April 2020

Professional Practise 2: Competitions

Professional Practise 2
Competitions - DevinElleKurtz Draw this in your Style Competition

  • Devin Elle Kurtz is a background artist working on Disenchantment and she decided to host a competition for the Draw this in Your Style challenge, where you redraw the piece of art they have chosen. The prizes for this are being featured on her page and a first place prize of receiving an Ink-based drawing of a pet or original character we choose.
  • I decided to take a different approach to this, by drawing the character in a different style. I saw a lot of the entries were trying to follow the realistic style and I wanted to explore a more stylised approach and work on posing for characters. Here is the competition post on Instagram and my response:

Devin Elle Kurtz' Instagram Post


My Entry Post


Applied Animation: Documentary - Fenrir Keyframes

Applied Animation
Documentary - Fenrir Keyframes and Betweens

  • This week:
    • I worked on the keyframes and inbetweens for Fenrirs' scenes.
  • What went well:
    • As the scene I was working on was a mix between frame-by-fame animation and puppet animation, I was able to expand my knowledge on using Toon Boom Harmony for this workflow. 
    • I worked in a specific workflow, which allowed me to key-frame and map-out each section of Fenrirs' body and then work on each part one at a time. This made the animation both consistent and worked effectively with keeping the movements of his body in sync with each other.
    • In order to make Fenrir as "animated" as I could, I focused on creating secondary animations and paid more attention to detail, within the scene, which makes the overall shot much more interesting.
Quick Environment Test to understand scale

Some additional layers of animation, with the tail and breath:

    • For the breath animation, I used a reference from YouTube of steam coming from a coffee cup, and paused the video every few seconds. This helped understand the flow and movement. This can be found here:

Initial keys and betweens:

    • Some feedback from this shot I received from my group was that the additional blink towards the end of the turn felt too jarring and needed to smooth it more and have his eyes just slowly open, so I adjusted and re-drew these frames.
Improved/Smoother Head Turn:


    • I, then, worked on the chains and rock for the scene. I did these similarly to the body, with puppet animation and pegs, in Toon Boom. 


    • One thing that I had developed on from previous scenes is my line-work, as I struggled with this initial with Jormungandrs' scenes. As I have come to understand the software better, this problem is easier to resolve.
  • What could be improved:
    • One thing that needs to be worked on for the rest of this week is making sure the steam from his breath is adjusted to be more accurate. I will have to explore more ways to do this after I have coloured it, but that could be adjusting the opacity or adding a blur effect.
    • I have additionally noticed that the tail flick is masked by the action of Fenrirs' head turn, so I want to find a better time for the flick to occur so that it is more noticeable when audiences view it.
  • Next week:
    • I will be working on the colouring and any improvements I have stated this week!

Tuesday, 14 April 2020

Professional Practise 2: LoopdeLoop Colouring

Professional Practise 2
Competitions: LoopdeLoop Colouring

  • This week I worked on the colour for one of the shots from the LoopdeLoop group animation and we needed to add the basket to one the already coloured frames. In order to keep the the same style, I created a very simple basket, with some strawberries already sitting in the basket. For the sake of ease, I made the basket rounded, so that it would be the same from any angle, without needing to redraw the basket.
  • For the colouring of the shot where the character looks disgusted, I added a red background and a slow gradient appearing, as the realisation of touching a mushy strawberry settles in her.
  • Here are the two animations I finished today for the LoopdeLoop.


Monday, 13 April 2020

Professional Practise 2: Competitions - CDC April

Professional Practise 2
Character Design Competition April

  • For this months' entry for the character design competition, I had more time to work on looking at different design ideas. I wanted to create another creature or animal design, as these are my stronger designs. The idea I came up with was to either create a bee or bear design for the theme, "Doctors and Nurses".
  • My take on this idea was to create a Bee character. I explored a few design ideas, such as the bear design first, but I went back to design a bee doctor. It played well with the "key-worker" Bee idea.
  • Here is my exploration and final design:


Facebook Post for submitting my entry:


Saturday, 11 April 2020

Applied Animation: Documentary - More tests and Fenrir

Applied Animation
More Puppet Tests and Fenrir Key-frames

  • This week:
    • I worked on creating more puppet animation and starting key-framing one of the scenes with Fenrir, which Caitlin will be inbetweening.
  • What went well:
    • I produced an additional test for the puppet animation for Jormungandr, with the side angle again. When I showed my group, we thought the it worked best with the angle from above, as it keeps the movement of the serpent going. It also illustrates the mass and scale of the serpent, which is something that's mentioned in the Prose Edda. Here is the comparison:
 Test 1:

Side Test 2:

Above Perspective Test:

    • In addition to this, I started key-framing Fenrirs' shots 24-26, as Caitlin will be inbetweening these. In order to keep the design and body consistent, I had to use Fenrirs' reference sheet beside me at all times and I needed to use references of wolves. Most of the references were taken from the website LineofAction.com, as this is a helpful tool.
    • I needed references of the skull structure, also, therefore I used the online tool: https://x6ud.github.io/#/ which shows a 3D model of animal skulls, which you can rotate to see from different perspectives:

    • The keyframes I drew were consistent and kept as anatomically close to the correct movements of the jaw as I could. The timing of the key-frames work well.


  • What could be improved:
    • There are a few mistakes with Fenrirs' keyframes, such as some lines missing from some frames, which is something I will just need to look over again.
    • The side angle slow-motion shot of Jormungandr would have worked if there wasn't an easing of frames as he reaches the peek of his dive our of the water. If the movement accelerated, or evenly moved into the slow-motion section, then it would have worked. If we decide that we would rather have the side-angle shot, I will keep this in mind when re-doing it.
  • Next week:
    • I will be working on Fenrirs' frame-by-frame animation!

Sunday, 5 April 2020

Applied Animation: Documentary - Learning Puppet Animation

Applied Animation
Learning Puppet Animation in Toon Boom Harmony

  • This week:
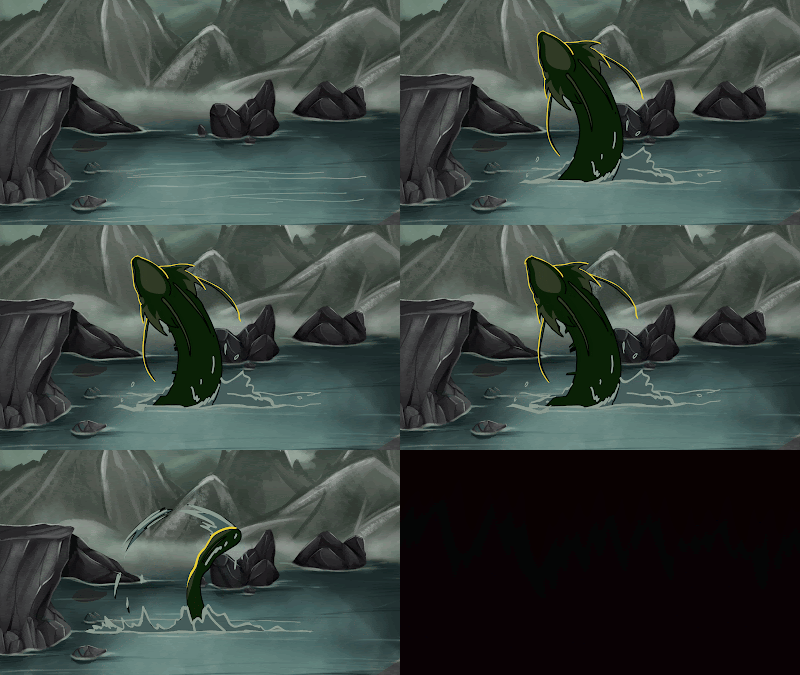
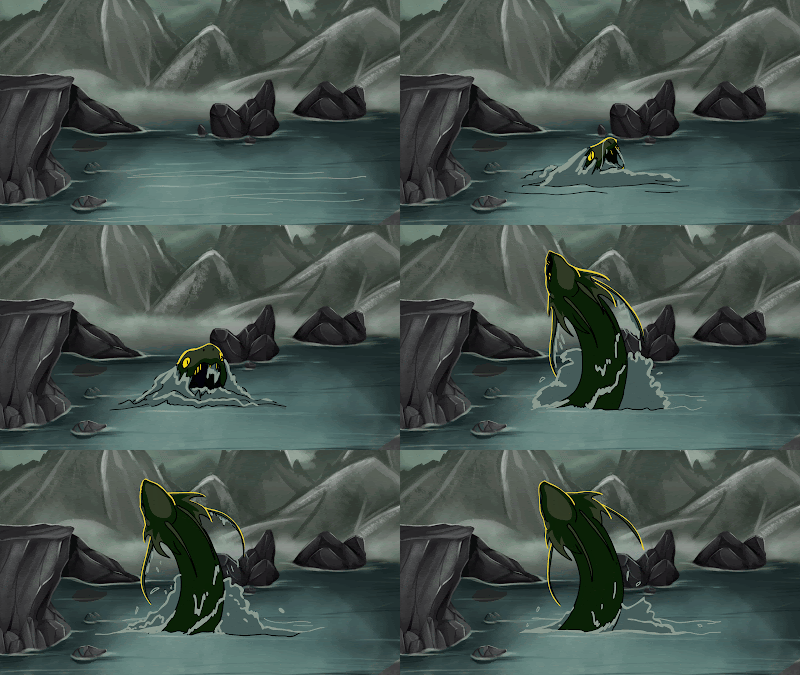
    • I learnt how to create puppet animation in Toon Boom Harmony and worked on Shot 6, for the Jormungandr section of the animation.
  • What went well:
    • Using Toon Booms' own tutorials and the help of Joseph, who has experience in puppeting in Toon Boom, I made some quick notes on how motion key-frames work, creating peg hierarchies and rigging with deformers. These are all of the tools I needed to create a full rig in Toon Boom.


    • The first test I tried was taking the already animated frames and then adding a quick rig to them, to extend the motion. This did not go to plan, as the rig wasn't set up properly and it needed to be more organised with pegs.
    • The second attempt I made in a separate file, from a different angle, just to see whether that would work better. This turned out the best so far, as I used separate layers, incorporated pegs and I also used rigging as well, for the fins and tendrils of the serpent.


    • This worked better, as I had a better understanding of how the pegs worked and I was able to apply a blur to specific layers, to create a sense of depth. This is something I can now use in future animations in Toon Boom.
  • What could be improved:
    • There still could be more improvements made to the motion and timing of the movement, especially with more experiments using the puppet feature and exploring the best way this can be done. I will be continuing to redo this shot, from multiple angles and making adjustments to timing, in order to improve it.
  • Next week:
    • Ill be continuing experimentation with the puppet tools and then starting the key-frames for the scenes with Fenrir.

Saturday, 4 April 2020

Applied Animation: Documentary - Colour Tests and Shading

Applied Animation
Jormungandr Colours and Shading

  • This week:
    • I finished the line-work for the frame-by-frame animation of Jormungandr and then worked on the colouring and improvements.
  • What went well:
    • Before starting the colouring, I adjusted the timing of shot 6, so it would be a little bit slower, as noted in my previous blog-post.
    • I learnt a lot about the colouring process in Toon Boom Harmony, such as adjusting the brush settings to allow for colouring below the lines or colouring over lines already placed. I was able to understand how the fill tool worked and using the gap-closer to my advantage when I hadn't properly joined up lines in the frames.
    • I needed to adjust the character sheets, as the shading colours had not been properly referenced, as it was to be applied as an overlay layer. I changed the colour so it could be used without needing layer effects. Here are the updated sheets:


    • In addition to this, I adjusted Jormungandrs' colour scheme, as on the dark background, he didn't stand out against the darker tones, so increasing the saturation helped with this, visually. 
    • I learnt that Toon Boom allows you to "assign" colours to certain assets, so if you wanted to change the colour at a later date, you would be able to. Therefore, I set colours for each different part, so if the shading or highlights needed to be adjusted, they could. Using this method, I was able to colour the shots efficiently.
Shot 4, with Colour:


Shot 6, with Colour:


    • As an improvement to Shot 6, I added additional frames to slow down the movement of the tail further and make the wave slow down also, as it still felt a little bit too fast.

  • What Could be Improved:
    • One criticism I noticed was the shakiness of my lines. As I was still getting used to Toon Booms' interface and the drawing tools, I didn't pay much attention to the neatness of my lines, which is something I really need to focus on when I line Jormungandr.
    • I think that the shading or the colours in the background need to be adjusted, to match the shadow colours, as this doesn't work that well. This could be done in post-production, if we don't have enough time, or can be adjusted in Toon Boom, if we decide that it's the colour of the serpent that needs changing and the background should remain the same.
    • Some waves could be added to the background, to further illustrate the impact of the serpent hitting the water, such as waves hitting the cliffside and the rocks at the back. I can come back to work on this at a later date, once all of the initial animation is complete.
  • Next week:
    • I will be learning how to create puppet animations in Toon Boom, in order to work on Shot 5, which is the slow-motion shot, between these two shots.