Showing posts with label LAUAN504. Show all posts

Sunday, 17 May 2020

Applied Animation: Documentary - Final Animation

Applied Animation
Final Animated Documentary

  • This week:
    • We completed the final documentary film!
  • What went well:
    • Overall, I believe we worked really well to organise ourselves as a group, we bounced off each others ideas, understood each others' feedback really well. I would love to work with both Joseph and Caitlin again, as I found they work very professionally and keep to deadlines really well.
    • I learnt so much this module, through Toon Boom Harmony, using more references, learning more about VFX animation. I really enjoyed the Visual Development stages of pre-production, such as exploring styles, producing some backgrounds, coming up with visual ideas. 
    • I additionally worked a lot on my timing and consistency with animation, by using more keyframes, to help with inbetweening. I enjoyed the colour process in Toon Boom and will continue to do this in the future!
    • Furthermore, I learnt a lot about After Effects compositing and improved my skills in using the software more efficiently.
  • What could be improved:
    • My composing of shots, and consistency with characters needs improvement. I also need to learn more with Toon Boom, which will come with using it more and exploring YouTube tutorials.
    • Despite working a lot on my timing for animation, I think it still needs work. A lot of the shapes and spacing needs improvement and the animation could be smoother.
    • Furthermore, I'd like to improve directing more in the future, as I learnt a lot about myself and I think I would like to do it again, next year.
Here is the final animation:


Applied Animation: Documentary - Credits and Press Pack

Applied Animation
Credits, Press Pack and Art Of Book

  • This week:
    • We finalised the press pack and worked on creating some additions to the credits, to make them more appealing.
  • What went well:
    • My initial designs for the credits, were small thumbnails of each character, as a sketchy silhouette. I initially tried a textured, paint splatter look for each character. Then, explored the possibility of a sketchy gif.

 First possible concepts to use:


Preferred Sketchy loops for Credits:


    • In addition to this, we added a border to the credits, which I designed, after multiple attempts. We liked my final design, because it looked like an embroidered pattern and made the visuals almost seem tapestry-like.
    • Here are the designs:


    • Furthermore, we completed the Press-Pack and put together an Art-Book for the full project. We wanted to express the level of effort and detail we had put into this research.
    • Here is both the Press-Pack and Art-Book:
Press Pack:

Art Book:


  • What could be improved:
    • The press pack could be further improved, with a title page for the full animation and more technical specifications for sound, running time, etc. 
    • The border could have included the Nordic names of characters appear in the side, when they come on-screen, which would be a nice small detail. As we don't have a lot of time, it was kept to a simple side border.
  • Next week:
    • The animation will be finalised, ready for submission and festival entry.


Applied Animation: Study Task 4 - Evaluate

Applied Animation
Study Task 4 - Evaluate

  • Overall, my animation and technical skills have improved the most within this module, such as in my 2D VFX work and character design skills.
  • In the future, I need to work on my research skills more and provide more exploration of ideas and concepts going forward. This can consist of making more test animations, looking are more possible ideas and making time to have more visual development in the pre-production stages.
  • Here is my full evaluation:


Tuesday, 12 May 2020

Applied Animation: Documentary - Jormungandr Post-Production

Applied Animation
Jormungandr After Effects Compositing and VFX

  • This week:
    • I worked on the post-production work for the documentary. Using After Effects I composited and edited Jormungandrs' scenes and created my own ways of making VFX in After Effects.
  • What went well:
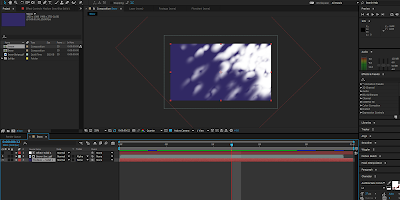
    • With a lot of experimentation and learning After-Effects through just working on this editing, I was able to add a lot to the current animated scenes, with fog, rain, particle effects and light rays. One of the first effects I added was light rain, using CC Particle World. I was able to experiment with particle world to create ripples of droplets on the surface of the water, by changing the particle type to Bubbles, adjusting the birth and death rates of the particles and the position in which they start. 
Ripple and Rain Effects
    • I had to adjust the rain position and water ripples, for the shot from above, to remain consistent between shots. This was done through just adjusting the angle at which the rain is viewed from. 
    • I found that the easiest way to create fog was creating a solid object, adding a mask, adjusting the feather of the mask and then adding noise. The fog was then copied and pasted, pre-composed to create multiple layers.
Adding fog layers
    • In addition to this, lights were a large part of final composition, such as Light Rays, which illustrate the serpent blocking out the light slightly and light rays as he comes down to circle the Earth. 
Light Rays

Light Rays 2

Final VFX, ready for Joseph to put together in Premiere:
  • What could be improved:
    • Overall, I think that the shots flow together quite well. I think there could be some pacing issues however, as though it moves too quickly. This is partly due to having to keep to a time limit/guide with the animation, when we made the animatic and storyboards. If we'd have known the timing could be extended further, we would have been able to pace the scenes much better.
    • There were issues with the water/wave transition before Jormungandr comes down to circle the Earth and I think that I would plan out the transition or test it more, next time, to make sure it would work well. I had to do quite a bit of post-editing for that part to make it work.
    • I think the layout could be improved in the future, also. This could be done through making more thumbnails and tests, to really make the audience understand perspective and sense of scale. This is something Ill look at in future projects.
  • Next week:
    • I will be putting together everything ready for submission.
  • Next week:

Sunday, 10 May 2020

Applied Animation: Documentary - Fenrir Scene and Additional Scene with Hel

Applied Animation
Fenrir Scene and Additional Scene with Hel

  • This week:
    • I took the work for a close-up scene of Fenrir, from Joseph and reused the spirits from the Hel scene I worked on last week, for an additional scene, as she walks towards the gates.
  • What went well:
    • I needed to do some research for the close-up shot of Fenrirs' paw and the chains, as I needed to understand more anatomical parts of the paw and how he could go about flexing his toes - as dogs are unable to actually "unsheathe" their claws. I found this diagram to help me explain this:

    • I realised this would be difficult to do with just puppet animation, as we had planned, so I decided to use a mix of both puppet and frame-by-frame animation, to illustrate Fenrir lifting his paw and flexing his toes. The added dust shift under his paw is an additional small detail, similar to the breath steam and added snow. These small details really make the character feel apart of the world and interacting with the environment.

    • Secondly, I also re-used the Spirit assets for another scene with Hel, to save both time and keep the shots consistent. All I needed to do was re-key the animation and puppet movement and time it to Hel walking to the gates, which is animated by Joseph.


  • What could be improved:
    • The new scene with Hel and the reused spirit animation could be further improved, with glow effects, making the spirits more opaque and additional VFX in post-editing. Joseph will be working on the post-production for Hels' scenes, so he will be the one to make those changes. 
    • I noticed some shakiness with the shadows on Fenrirs' leg, which I hadn't noticed before. This is just a small error on my part, when I was animating the shadows. Next time, Ill make sure to use the pencil line method, before filling in the shadows on each frame. The shot could also be further improved in post, with added snow-fall and some colour adjustments, to fit better with the narration.
  • Next week:
    • I will be working on Jormungandrs' compositing in After Effects.

Applied Animation: Documentary - Transitions

Applied Animation
Creating Transitions

  • This week:
    • Im working on the post-production for the documentary.
  • What went well:
    • In order to create a snow transition for Fenrir, I animated a snow-swipe in Toon Boom Harmony, which just swipes across the screen. I wasn't able to use many references for this, so I had to experiment a bit with the movement. I was able to create one that could be edited further:

    • This, however, needed further improvement. It needed to work with the snow-fall that would already be in the scene and transition smoothly. Once I took it into After-Effects and used the Particle World effects, I created a realistic-looking snowfall. 


    • Using a mask, and creating a snow-fall with the Particle World effects, it broke up the swipe more, to make it look more like snow. Once I added an additional layer of lighter snow-fall, it would transition much better between shots.
The Final Snow-Swipe Transition:


  • What could be improved:
    • Although it works well, I could have found a way to use a reference or looked for more inspiration to help me animate the snow swipe. The final composition could have been put together better if the original animation worked well. This is something I can remember for next time.
  • For the rest of this week:
    • I will be working on the VFX and compositing for Jormungandr.


Sunday, 3 May 2020

Applied Animation: Documentary - Minor Animation Additions

Applied Animation
Additional Animations

  • This week:
    • I worked on a test for Odins' crows animation, a small transition and started the animation for Hel.
  • What went well:
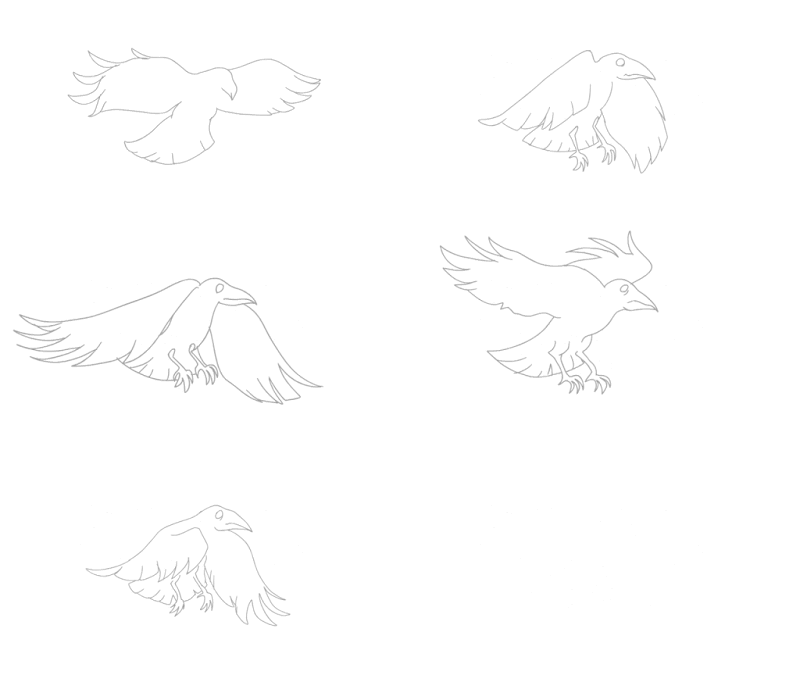
    • I used a reference of a crow gliding and hovering to help with the animation for the crow gliding over Odins' head. I found that when a crow is adjusting its' position when hovering, they don't perform a full wing flap, to just adjust themselves in the air. I tried to demonstrate this in the animation.
    • The line-work and colouring was quite consistent, when I lined it and made improvements.
First test:


Final render:

    • Then I worked on Hels' spirits shot. The spirits animation proved the most difficult, as I wasn't initially sure how to key the souls of the dead circling her. I had an idea to use the puppet tools that Toon Boom Harmony has, to keep the movement consistent. This was more successful than my initial attempts at lining it frame by frame. I made a "sprite" for the soul animation and then duplicated it, and key-framed the animation.
    • Caitlin animated Hel sitting and the background was made by Joseph, then I contributed to this scene with the movement of the souls. Here is the work in progress of this, so far and a screenshot of the keyframes from Toon Boom.
 How I keyed and timed each spirit in Toon Boom Harmony

Final export


  • What could be improved:
    • The movements of the crow could be made more consistent. Sometimes the wing movement seems a bit odd, despite using a reference, which could be due to the angle at which the crow is positioned and the reference I used. Next time I use a reference, especially for this kind of movement, I will use a reference from a similar camera angle to what I want the movement to be.
    • For Hels' animation, the souls need to be slightly adjusted, as some movements are a bit broken because some errors with the keyframes, in Toon Boom. This is a quick fix, as I can go into the software and make some small changes. They also need to be re-exported on a green background, to be keyed out in Adobe After Effects.
  • Next week:
    • I will be exporting most scenes ready for post-production work.

Thursday, 30 April 2020

Applied Animation: Documentary - Fenrir Puppet Animation

Applied Animation
Fenrir Puppet Animation

  • This week:
    • I worked on the final shot of Fenrirs' scenes, which is puppeted animation in Toon Boom Harmony.
  • What went well:
    • I was able to recreate an effective slow-motion shot, using multiple layers in Toon Boom Harmony, similarly to how I created the slow motion animation for Jormungandr. 
      • This included puppeting each body part and I had effectively learnt how to rig, so the drag on his paws were created with this method.
    • My first attempt included a few frames showing his head facing down, before he lifts up and it felt quite jarring, so I removed this when I animated the anticipation shot before, as that already demonstrated that movement.
First test

Removed beginning frames

  • When I added snow, it really helped to amplify the movement of his paws coming up from the ground and flicking up the snow, into the air. Once that was approved by my group, I could start on the fetter animation, which proved the most difficult, as I needed to animate it as though it was moving in slow motion.


  • Adding effects, such as the glow, made the fetter stand out more, and implicate it's special qualities, visually. 


  • What could be improved:
    • The width of the fetter needs to be adjusted, as it's too wide at the moment. I'll be doing this before re-exporting, to make sure that it is consistent with Caitlins' frames.
    • This shot could be further improved in post-production, with slow-motion mist effects and slow motion falling snow, which Joseph and I will be creating in After-Effects.
    • Finally, this can be further improved to fit in better with the shots before and after, with a snow fall transition effect. I will be experimenting with this next week.
  • Next week:
    • I will be exporting the animation work so far to prepare for post-editing. I need to finish some final details, such as transitions and last-minute edits to the animation.

Saturday, 25 April 2020

Applied Animation: Documentary - Fenrir Colouring and Shading 2

Applied Animation
Fenrir Colouring and Shading 2

  • This week:
    • I worked on the anticipation shot of Fenrir and start the puppet animation.
  • What went well:
    • I smoothed out the frames from my previous post and started the colouring process for Fenrir. This process has gotten easier since I started using Toon Boom Harmony, as I have gotten more used to working in the software.
Colouring and Shading Frames:

    • The shading is consistent and the added highlight, using the previous method from my Jormungandr scenes, helps break up shapes.
    • Additionally, animating the chains were a lot easier, as I already had drawn the assets for these and just needed to puppet them again, using the peg tool and rigging. 
Puppeted Chains:


    • I noticed that the last few frames needed to be extended a little bit, as it moves too quickly to see what's happening. Whilst extending these, I added a slight snow flick and steam from his breath, to keep consistent with the previous shot. The snow flick also illustrates the speed at which he lifts himself up, as the snow drags up with his paws.
Added Breath linework and snow:

 Coloured and Blurred Breath:

Slowed final few frames and moving shadow:

  • What could be improved:
    • Fenrirs' leap up to break the chains could be illustrated more clearly, or even continue further before it cuts to the slow-motion puppet shot of him. As this wasn't a fully planned shot, I will keep that in mind next time and plan it more to understand the full movement of the character.
    • I will put this with the slow-motion shot and see if it works fine. If it seems to cut too quickly, then adjustments can be made. 
    • Finally, this could be further improved in post-production, with added snow and moving fog to illustrate the cold atmosphere.
  • Next week:
    • I will be working on this alongside the puppet animation to make them flow together.

Wednesday, 22 April 2020

Applied Animation: Documentary - Fenrir Keyframes and Betweens 2

Applied Animation
Fenrir Keyframes and Betweens 2

  • This week:
    • I worked on more scenes for Fenrir, focusing on Keyframes and betweens.
  • What went well:
    • Before the puppet animation, there is a short shot where Fenrir anticipates leaping up to break the chains. I wanted to spend time making sure this was done before focusing on the puppet animation, for the rest of this week.
    • I used several references of dog movements to help me to understand how Fenrir could lift himself up. I wanted it to seem like he was pushing on his front weight, before shifting the weight to his hind legs, as the references I had looked at seemed to demonstrate this when dogs try standing up. I wanted him to remain in a crouch, however, so when I used references, I needed to keep this in mind.
This reference doesn't have a similar angle, but it did help me to understand this transfer of body weight:


    • I started by keyframing the head movements, with the body and tail on separate layers. When I showed my group my progress, they suggested making the head lowering as one smooth movement, which is what I then changed.
Head movement before:

Smoothed head movement:

    • I additionally noticed that if it was going into the next shot, which is the slow motion, their may need to be additional frames to just show Fenrir lifting the front half of his body. I was able to then smooth out the animation for the body and tail.

  • What could be improved:
    • The movement of the last few frames of Fenrir lifting up needs to be adjusted for timing, which I will look at for the rest of this week.
    • The chain animation needs adding, to remain consistent with the previous shot of him, in addition to the colouring and shading.
  • The rest of this week:
    • I'll be fixing any movements and then colouring, shading and adding any additional VFX to the animation.

Sunday, 19 April 2020

Applied Animation: Documentary - Fenrir Colour and Shading

Applied Animation
Documentary - Fenrir Colour and Shading


  • This week:
    • I worked on the colouring, shading and highlights for one of Fenrirs' scenes. I additionally found ways of improving on aspects I had noted in my previous blog-post.
  • What went well:
    • The colour process was previously quite tedious, as I had not fully understood the software yet, however I managed to figure out and learn some short-cuts and tricks which helped the colouring and shading process speed up.
    • I started by colouring the breath animation and then adding a blur effect to this. This straight away improved the look and appeal of the breath, making it seem more realistic.

    • After quickly colouring the flat-colours, I then went on to shading. This was the longest part of the colouring process, previously, however I had found a better way of colouring, using the select by colour tool. This meant that I could select a line of the same colour and delete it. I drew a red line, with the pencil tool, to indicate where I wanted the shading, went back and filled in the shading and then a third time to remove the red line. This made the process a lot faster.

 Flat-colours:

Select by colour tool in Toon Boom assisted with the shading process:


    • Then, the highlights were added to keep the same consistency and contrast similarly to the Jormungandr scenes. I made adjustments to the tail animation, so it would occur just after Fenrir turns his head, so it's more noticeable, as I had mentioned that in my previous post.
    • Here is the final shot: (the colours are slightly compressed as it is a GIF)

  • What could be improved:
    • I think that next time I do this it will be much quicker and smoother, as some of the shading lines do wobble a little bit.
    • Another thing I wanted to note was the possibility of adding light snow-fall or mist to the scene in post-production, as it would really add more to the atmosphere and illustrate the coldness of the scene. This is something I will keep in mind once the documentary is ready to edit.
  • Next week:
    • I will be working on the puppet animated scenes for Fenrir.

Thursday, 16 April 2020

Applied Animation: Documentary - Fenrir Keyframes

Applied Animation
Documentary - Fenrir Keyframes and Betweens

  • This week:
    • I worked on the keyframes and inbetweens for Fenrirs' scenes.
  • What went well:
    • As the scene I was working on was a mix between frame-by-fame animation and puppet animation, I was able to expand my knowledge on using Toon Boom Harmony for this workflow. 
    • I worked in a specific workflow, which allowed me to key-frame and map-out each section of Fenrirs' body and then work on each part one at a time. This made the animation both consistent and worked effectively with keeping the movements of his body in sync with each other.
    • In order to make Fenrir as "animated" as I could, I focused on creating secondary animations and paid more attention to detail, within the scene, which makes the overall shot much more interesting.
Quick Environment Test to understand scale

Some additional layers of animation, with the tail and breath:

    • For the breath animation, I used a reference from YouTube of steam coming from a coffee cup, and paused the video every few seconds. This helped understand the flow and movement. This can be found here:

Initial keys and betweens:

    • Some feedback from this shot I received from my group was that the additional blink towards the end of the turn felt too jarring and needed to smooth it more and have his eyes just slowly open, so I adjusted and re-drew these frames.
Improved/Smoother Head Turn:


    • I, then, worked on the chains and rock for the scene. I did these similarly to the body, with puppet animation and pegs, in Toon Boom. 


    • One thing that I had developed on from previous scenes is my line-work, as I struggled with this initial with Jormungandrs' scenes. As I have come to understand the software better, this problem is easier to resolve.
  • What could be improved:
    • One thing that needs to be worked on for the rest of this week is making sure the steam from his breath is adjusted to be more accurate. I will have to explore more ways to do this after I have coloured it, but that could be adjusting the opacity or adding a blur effect.
    • I have additionally noticed that the tail flick is masked by the action of Fenrirs' head turn, so I want to find a better time for the flick to occur so that it is more noticeable when audiences view it.
  • Next week:
    • I will be working on the colouring and any improvements I have stated this week!

Saturday, 11 April 2020

Applied Animation: Documentary - More tests and Fenrir

Applied Animation
More Puppet Tests and Fenrir Key-frames

  • This week:
    • I worked on creating more puppet animation and starting key-framing one of the scenes with Fenrir, which Caitlin will be inbetweening.
  • What went well:
    • I produced an additional test for the puppet animation for Jormungandr, with the side angle again. When I showed my group, we thought the it worked best with the angle from above, as it keeps the movement of the serpent going. It also illustrates the mass and scale of the serpent, which is something that's mentioned in the Prose Edda. Here is the comparison:
 Test 1:

Side Test 2:

Above Perspective Test:

    • In addition to this, I started key-framing Fenrirs' shots 24-26, as Caitlin will be inbetweening these. In order to keep the design and body consistent, I had to use Fenrirs' reference sheet beside me at all times and I needed to use references of wolves. Most of the references were taken from the website LineofAction.com, as this is a helpful tool.
    • I needed references of the skull structure, also, therefore I used the online tool: https://x6ud.github.io/#/ which shows a 3D model of animal skulls, which you can rotate to see from different perspectives:

    • The keyframes I drew were consistent and kept as anatomically close to the correct movements of the jaw as I could. The timing of the key-frames work well.


  • What could be improved:
    • There are a few mistakes with Fenrirs' keyframes, such as some lines missing from some frames, which is something I will just need to look over again.
    • The side angle slow-motion shot of Jormungandr would have worked if there wasn't an easing of frames as he reaches the peek of his dive our of the water. If the movement accelerated, or evenly moved into the slow-motion section, then it would have worked. If we decide that we would rather have the side-angle shot, I will keep this in mind when re-doing it.
  • Next week:
    • I will be working on Fenrirs' frame-by-frame animation!